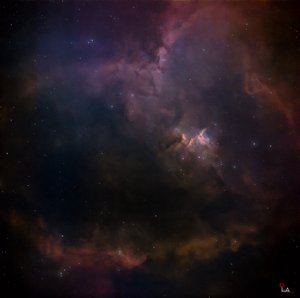
Since we’re on the topic of camera angles, I’d like to explain one more thing based on my experience. I learned this particularly well while imaging Sh2-129 and OU4. In astrophotography, we track our targets as the Earth rotates. As a target moves from east to west across the sky, it eventually approaches the meridian line, which passes directly overhead through the zenith. When the target reaches the meridian, our imaging systems will pause temporarily, depending on the settings we have configured.
Once the target has crossed the meridian, the imaging systems resume capturing images. However, after a meridian flip, the target’s orientation in the camera frame can change by approximately 180°. Therefore, we need to adjust the camera angle accordingly. If we forget to do so, all the images captured after the meridian flip may have an orientation that differs by approximately 180° from those captured before the flip. That is why adjusting the camera angle after a meridian flip is an important step that we should not overlook.
There are two ways to adjust the camera angle. The first is to do it manually, and the second is to use a Camera Angle Adjuster (CAA). The advantages of using a CAA include the ability to set the camera to a precise angle and the convenience of making adjustments without spending time doing them manually. However, using a CAA does not guarantee that the images captured before and after the meridian flip will align perfectly. There may still be a rotational difference of around 2–3 degrees. Fortunately, this small discrepancy can be corrected using the StarAlignment process in PixInsight.
When using a CAA, there is another important point to keep in mind. Based on my own experience, if the initial camera angle is between 0° and 5°, or between 355° and 360°, the CAA may not automatically perform the adjustment for safety reasons. To explain this more clearly, these angles are close to the 0°/360° boundary. Depending on the CAA’s mechanical rotation limits and its configured rotation range, the available direction of rotation may be restricted. Therefore, we should not always assume that the CAA will automatically rotate to the desired angle.
To understand why this can happen, we need to consider how the CAA handles rotation. In my experience, its behavior is not always equivalent to rotating freely through the full 0°–360° range using whichever direction is shortest. Instead, its rotation behavior may be constrained by the selected rotation range and safety limits, effectively favoring certain rotation paths within different angular ranges. For example, suppose the target’s desired camera angle is 100°, while the current camera angle is 270°. The CAA may rotate counterclockwise toward the desired angle rather than rotating clockwise from 270° through 0° to reach 100°, depending on its rotation settings and limits.
Now consider another example: the target requires an angle of 3°, while the camera is currently positioned at 357°. Although rotating clockwise from 357° to 3° would be the shortest path, the CAA may not take that route. If the alternative counterclockwise rotation is also restricted by its safety limits, the CAA may refuse to rotate automatically. In this situation, we may need to open the CAA control page and manually enter the desired angle value to command the rotation. This is an important detail to remember.
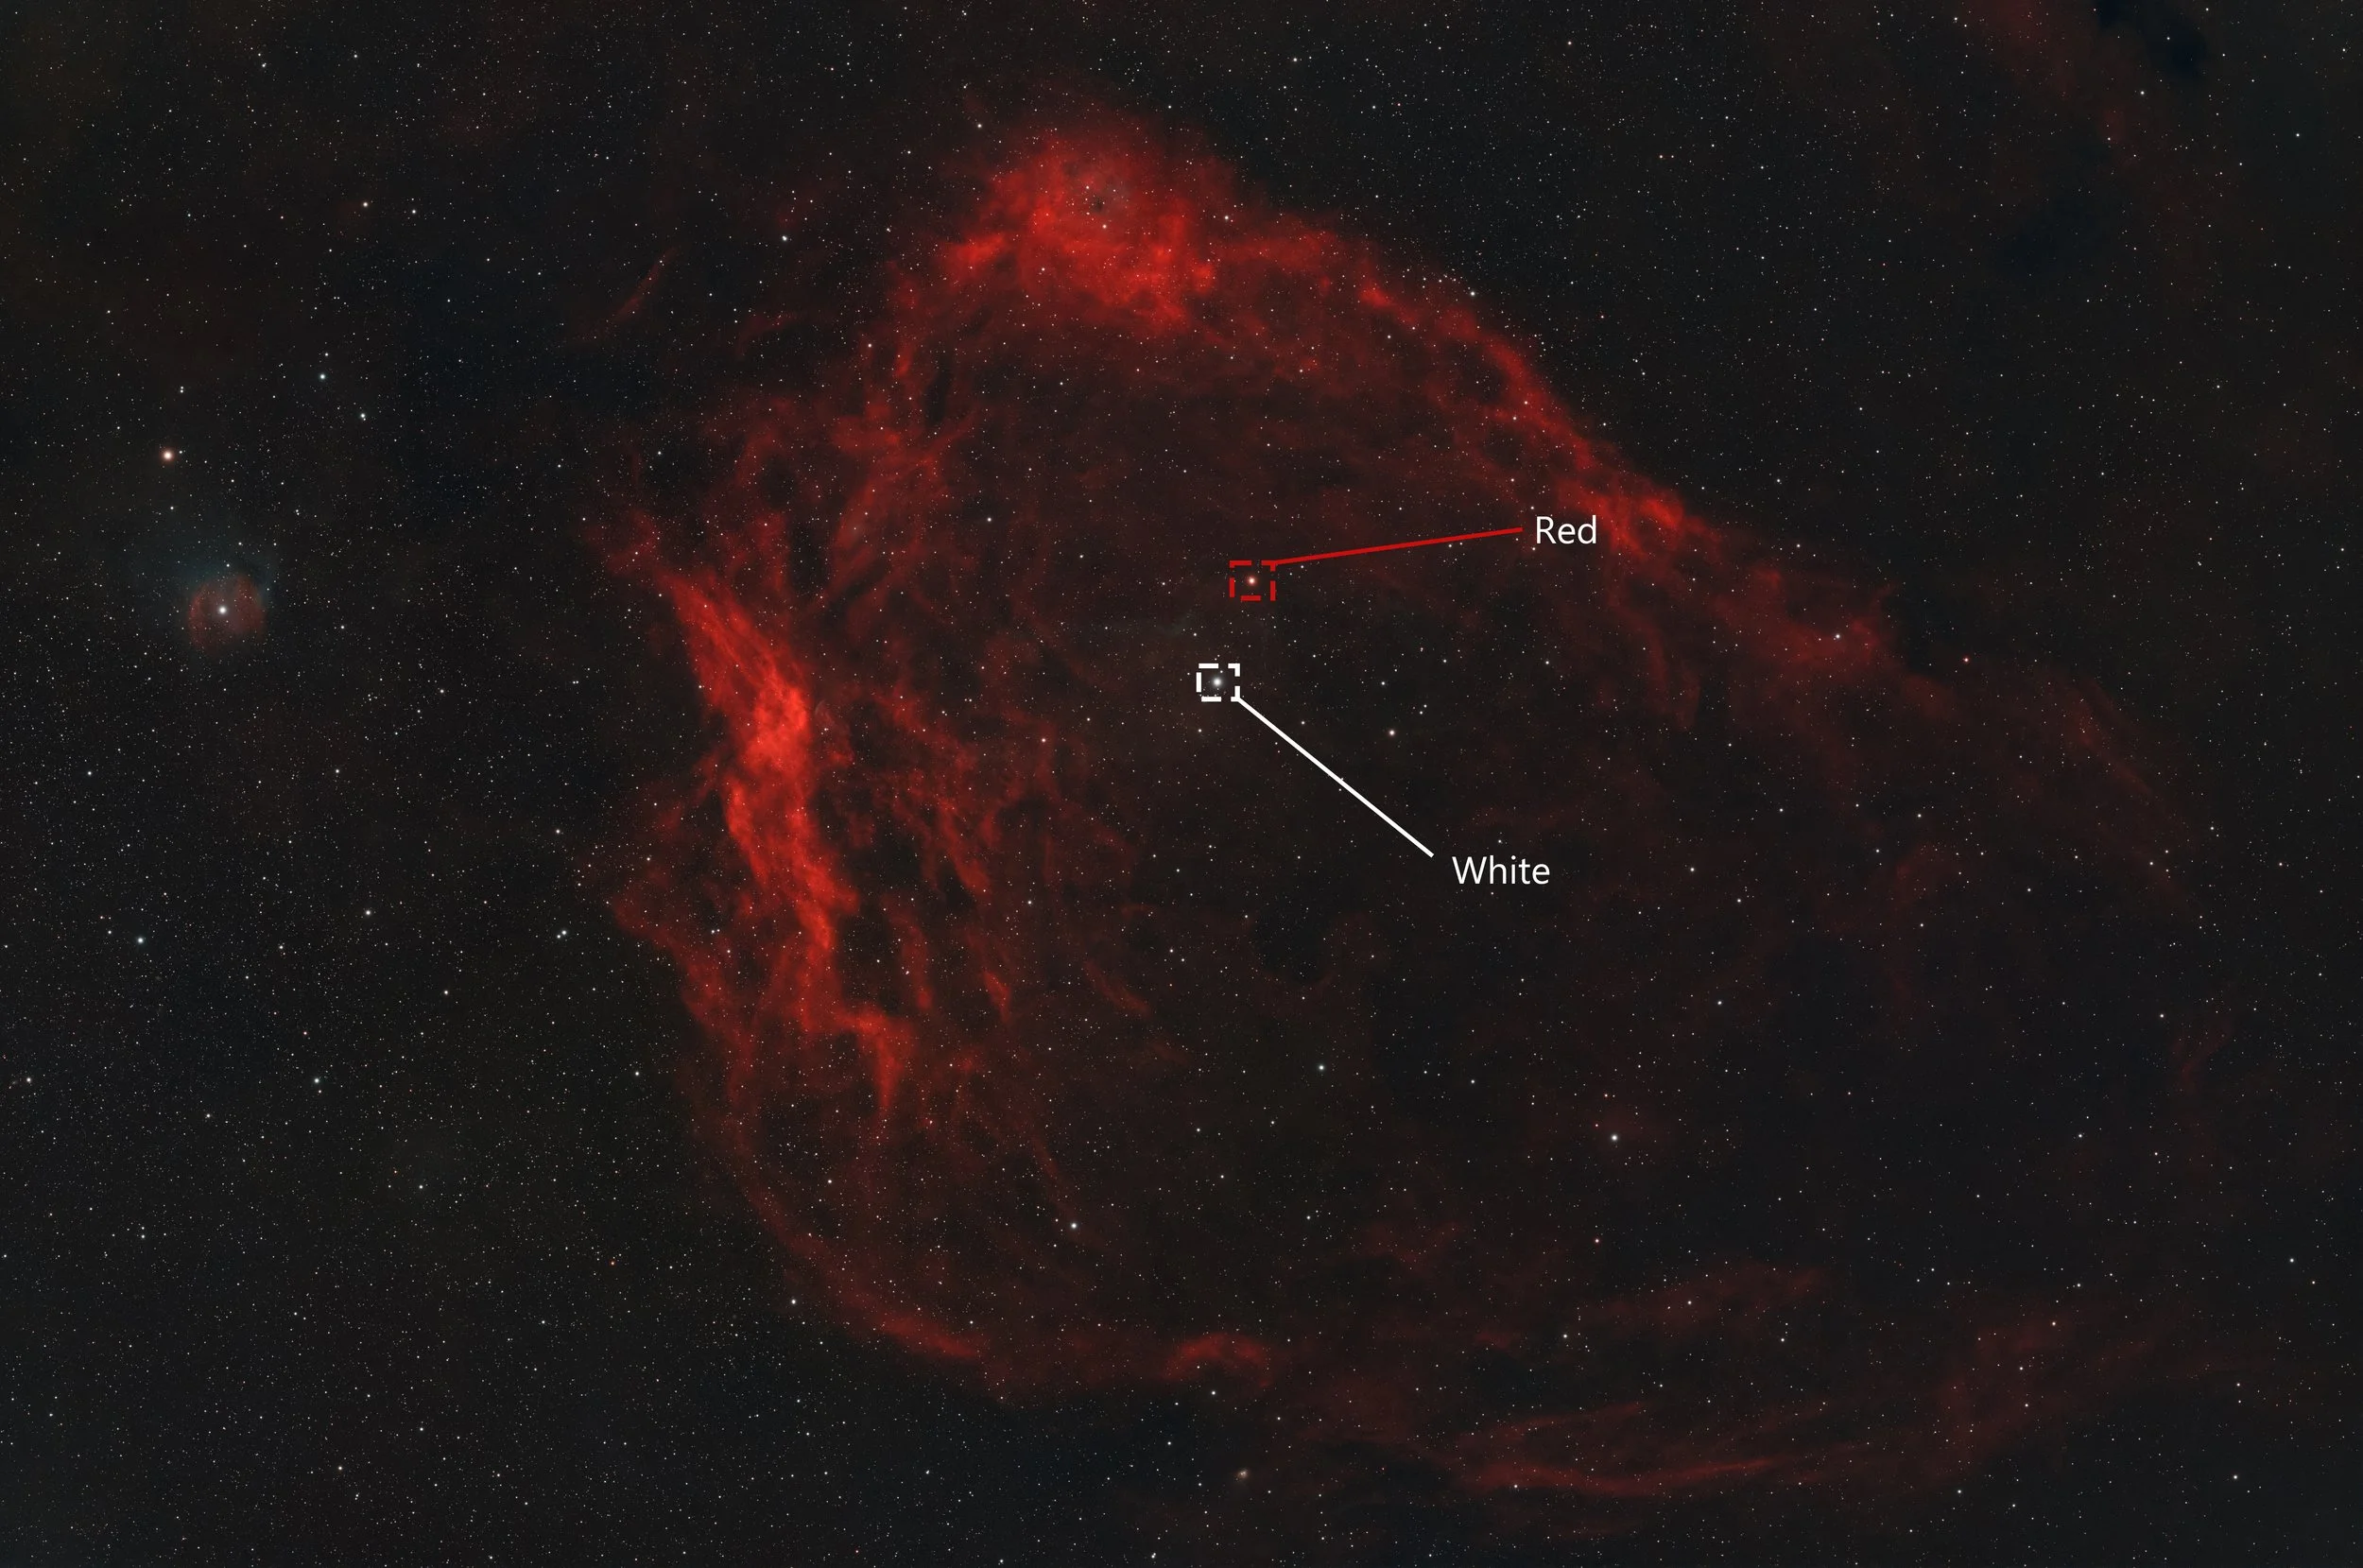
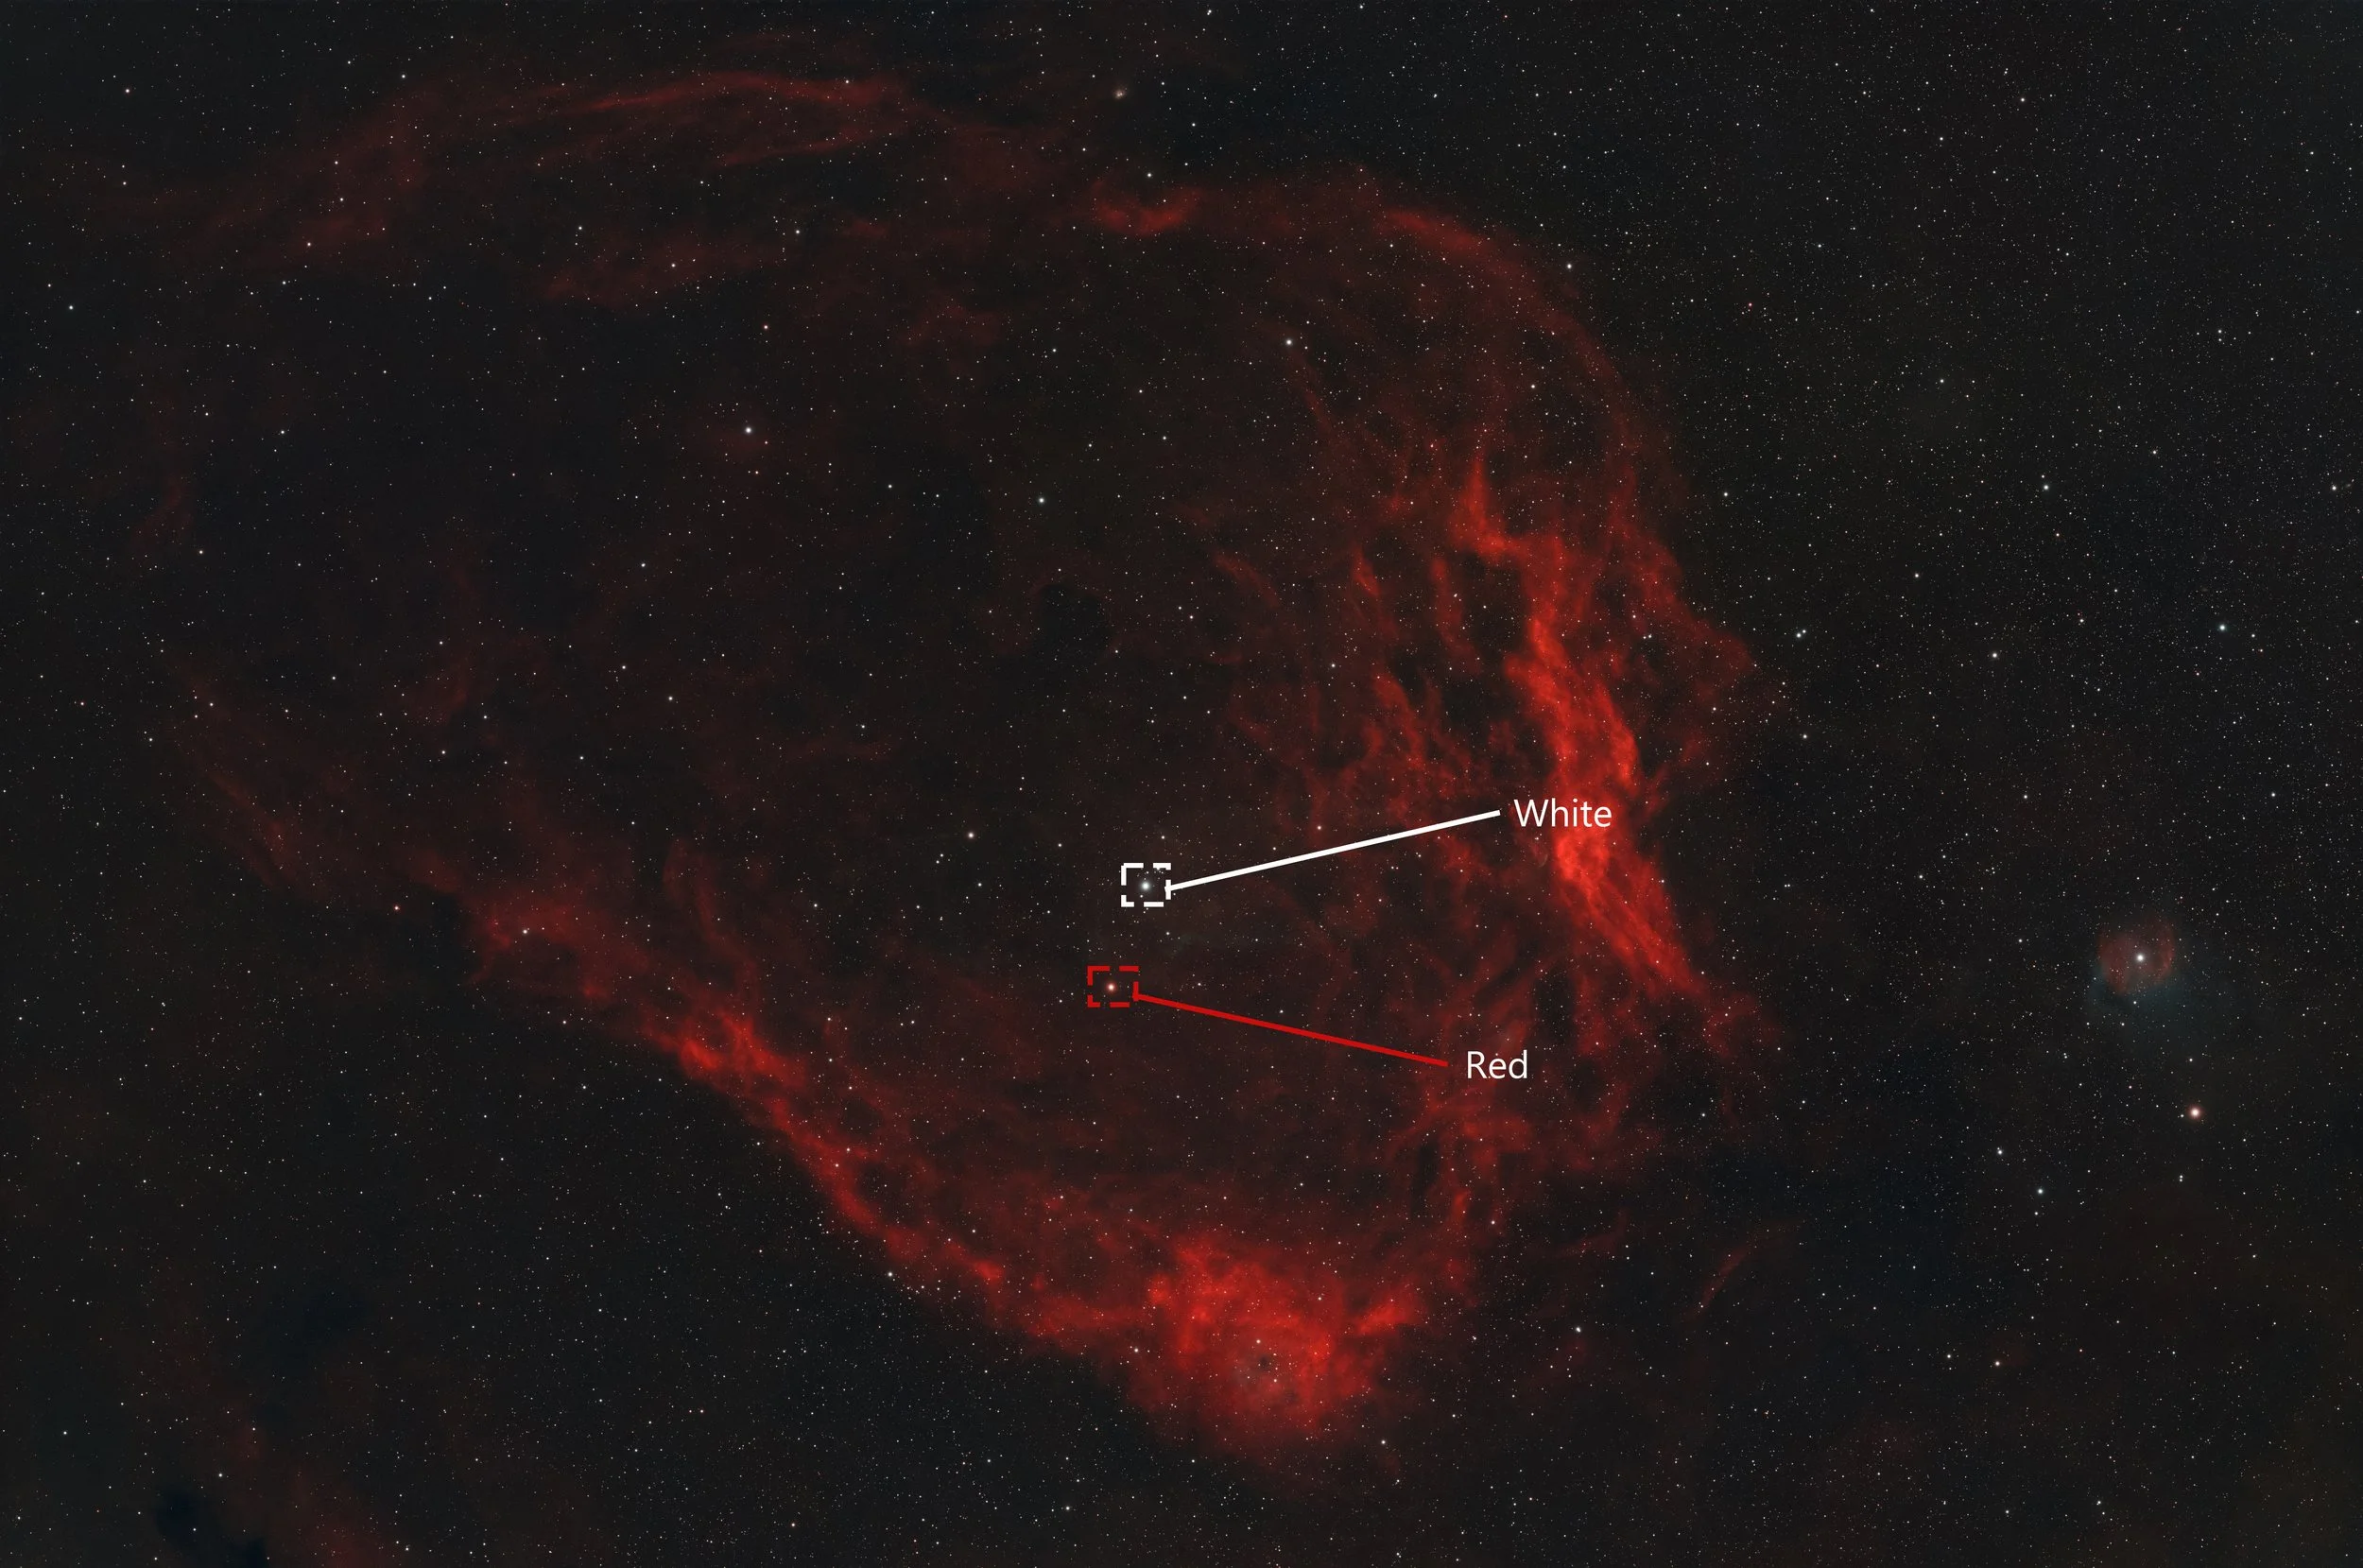
For this reason, I strongly recommend checking the target’s camera orientation in the preview before starting an imaging session. Take note of the initial camera angle value, the positions of the stars, and their colors. These details can be extremely helpful when verifying whether the camera angle remains correct throughout the imaging session. Why is this so important? When I was imaging Sh2-129 and OU4, two stars near the center of the target appeared diagonally aligned. Even if the image is rotated by 180°, those two stars will still appear diagonally aligned. Their relative arrangement alone is therefore insufficient to determine whether the camera orientation is correct. Unless we verify the orientation using the surrounding stars or the individual colors of those two stars, we might mistakenly assume that the camera angle has remained unchanged when it has actually rotated by approximately 180°.
This brings up an important question: Can’t we verify the orientation by looking at the nebula’s structure? Of course, we can, but it doesn’t always work. The reason is that it depends on the narrowband filter we use. Since H-alpha (Ha) is the primary signal in many nebulae, if we use a filter like the L-Synergy, the Ha signal may not be clearly visible in the preview. Alternatively, the nebula itself may naturally have a relatively weak Ha signal. As a result, it can be difficult to determine whether the nebula’s orientation is correct or not.
Note: The 0°–5° and 355°–360° ranges should not be considered universal safety limits applicable to every CAA model. These values are based on my own testing and observations, and it is more accurate to describe them as findings from my personal experience.
Clear skies and happy observing…..
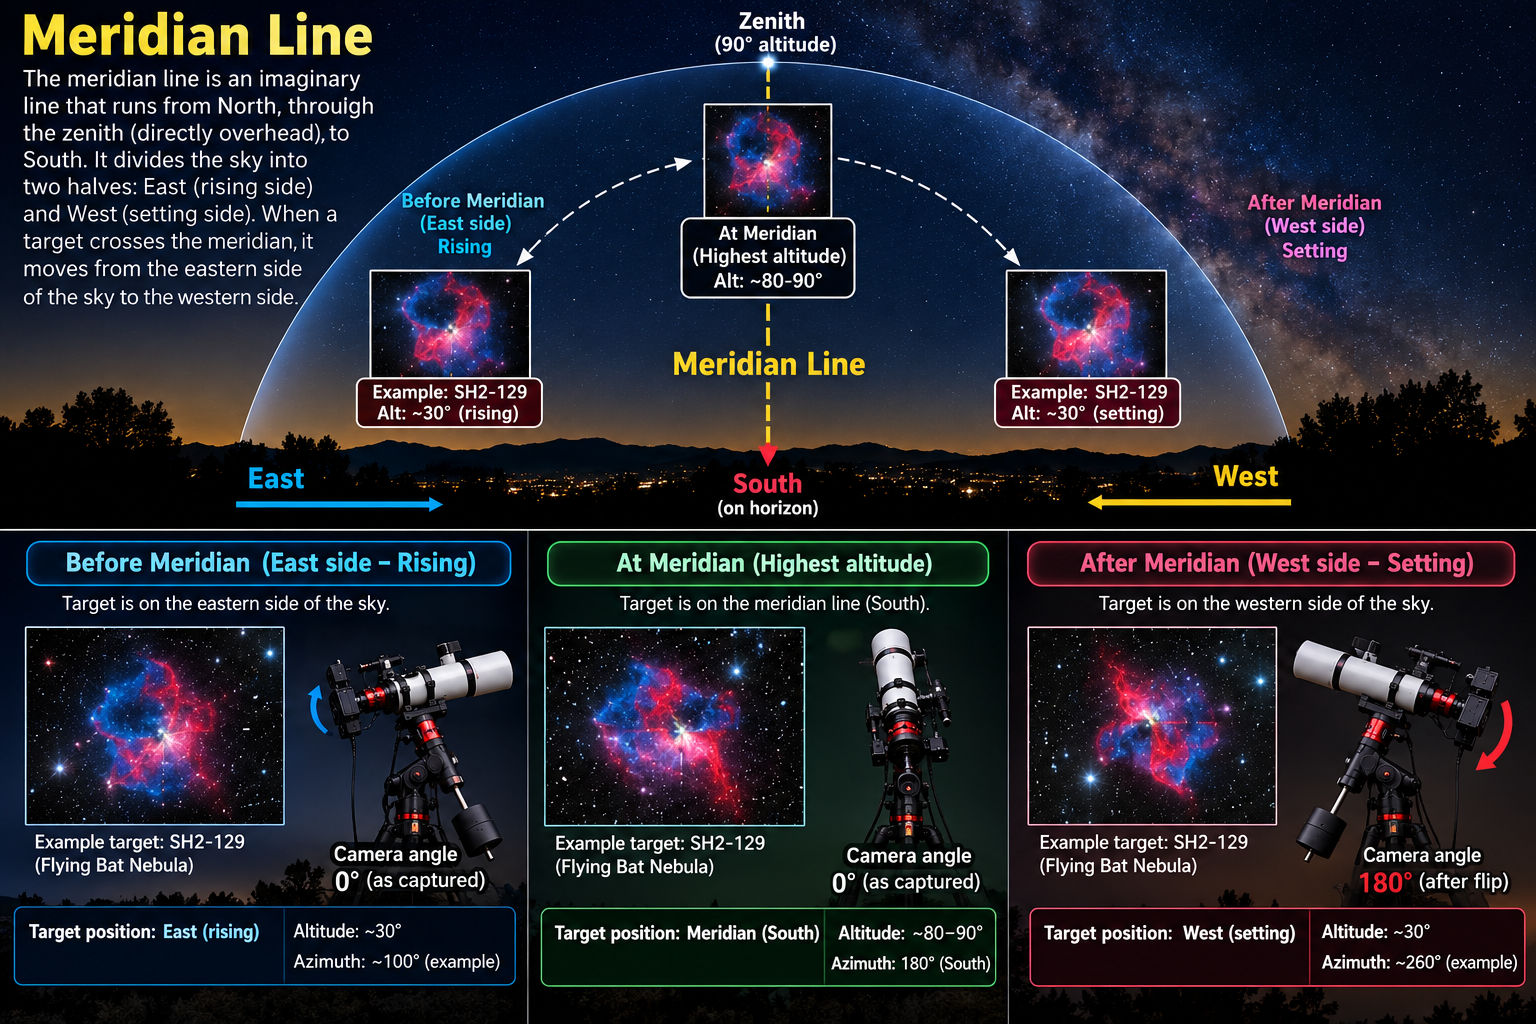
ကင်မရာ angle နဲ့ပတ်သက်ပြီးတော့ကြုံကြိုက်တုန်းလေး တစ်ခုလောက်ထပ်ပြီးရှင်းပြပါရစေ။ အဲ့အတွေ့အကြုံကလည်း Sh2-129 + Ou4 ကိုရိုက်တော့မှပဲကောင်းကောင်းရလိုက်တာမို့လို့လည်းပါပါတယ်။ Astophotography မှာက Earth rotation အတိုင်းလိုက်ပြီးရိုက်ရတာမို့လို့ target ကအရှေ့ဖက်ကနေအနောက်ဖက်ကိုသွားတယ့်အခါ ကိုယ့်ရဲ့ခေါင်းပေါ်တည့်တည့် Zenith ကိုရောက်တယ့်အချိန်ကြရင်ဖြတ်ရတယ့် meridian line ဆိုတယ့်နေရာကိုရောက်ခါနီးရင် ကင်မရာတွေအားလုံးကကိုယ် setup ထားတယ့် setting အပေါ်မူတည်ပြီးခဏရပ်နားကြပါတယ်။
Target က meridian line ကိုကျော်ပြီးသွားတော့မှ ကင်မရာတွေအားလုံးကပြန်ပြီးအလုပ်ဆက်လုပ်ကြတာပါ။ Meridian line ကိုကျော်ပြီဆိုတာနဲ့ target ရဲ့ angle က 180° ပတ်ဝန်းကျင်လောက်ပြောင်းလဲသွားတာမို့လို့ ကိုယ့်ရဲ့ကင်မရာ angle ကိုလိုက်ပြီးချိန်ညှိပေးရပါတယ်။ အကယ်၍ချိန်ညှိပေးဖို့မေ့သွားခဲ့ပြီဆိုရင် အဲ့ဒီနောက်ပိုင်းကင်မရာကဆက်ရိုက်ထားတယ့်ပုံတွေအားလုံးဟာ meridian flip မဖြစ်ခင်ကရိုက်ထားတယ့်ပုံတွေအားလုံးနဲ့ 180° ဝန်းကျင်လောက်ကွာခြားသွားမှာပါ။ ဒါကြောင့် ကင်မရာရဲ့ angle ကိုချိန်ညှိခြင်းက meridian flip ပြီးသွားရင်မဖြစ်မနေကိုလုပ်ဆောင်ပေးရမယ့် အချက်တစ်ချက်ပါပဲခင်ဗျ။
ကင်မရာရဲ့ angle ကိုချိန်ညှိရာမှာရွေးချယ်စရာ နစ်ခုရှိပါတယ်။ ပထမတစ်ခုက manually ဖြစ်ပြီး နောက်တစ်ခုကတော့ CAA ဆိုတယ့်ကင်မရာ angle adjuster ကိုသုံးခြင်းတို့ပါပဲခင်ဗျ။ CAA ကိုသုံးခြင်းကြောင့်ရနိုင်တယ့်အကျိုးကျေးဇူးတွေကတော့ တိကျတယ့် angle ကိုချိန်ညှိပေးနိုင်ခြင်း၊ manually လိုမျိုးချိန်ညှိတယ့်အခါအချိန်တစ်ခုမပေးရခြင်းတို့ပါပဲ။ ဒါပေမယ့် CAA ကိုသုံးခြင်းကြောင့် ပုံရိပ်နှစ်ခုစလုံး လုံးဝထပ်တူကျနေမယ်လို့တော့မဟုတ်ပါဘူး။ 2 to 3 degree လောက်ကတော့ tolerance အနေနဲ့ရှိနေအုန်းမှာပါခင်ဗျ။ အဲ့ဒီလောက်ကွာခြားမှုလောက်ကိုတော့ PixInsight ထဲက star alignment ဆိုတယ့် feature နဲ့ဖြေရှင်းလို့ရပါတယ်။
CAA ကိုသုံးမယ်ဆိုရင် နောက်တစ်ချက်အထူးသတိထားရမယ့်အချက်တစ်ခုကတော့ ကိုယ့်ရယ့် angle value က ကနဦးစရိုက်ခါစမှာ 0 to 5° အတွင်းနဲ့ 355 to 360° အတွင်းမှာရှိနေမယ်ဆိုရင်တော့ CAA က safety အရ adjust လုပ်ပေးပါမဟုတ်ပါ။ ပိုပြီးရှင်းအောင်ပြောရမယ်ဆိုရင် ဒီ angle တွေဟာ 0°/360° နယ်နိမိတ်နားမှာ ရှိနေပါတယ်။ CAA ရဲ့ mechanical rotation limit နဲ့ ရွေးထားတဲ့ rotation range ပေါ်မူတည်ပြီး လှည့်မယ့်လမ်းကြောင်းကို ကန့်သတ်နိုင်ပါတယ်။ ဒါကြောင့် CAA က အလိုအလျောက် လှည့်ပေးမယ်လို့ အမြဲမယူဆသင့်ပါဘူးလို့ဆိုလိုချင်တာပါ။
Angle တွေဟာ 0°/360° နယ်နိမိတ်နားမှာ ရှိနေပါတယ် ဆိုတယ့်အချက်ကိုရှင်းပြရမယ်ဆိုရင် CAA ရဲ့သဘောတရားက 0 to 360° ကိုတောက်လျှောက်လည်ပတ်ပေးတာမဟုတ်ပဲ 0 to 180° နဲ့ 181 to 360° ဆိုပြီးတော့နှစ်ခြမ်းခွဲပြီးချိန်ညှိပေးတာပါ။ ပိုရှင်းအောင်ပြောရမယ်ဆိုရင် လက်ရှိကိုယ့် target က 100°မှာရှိနေပြီးတော့ လက်ရှိကိုယ့်ကင်မရာ angle က 270° ရှိနေပေမယ့် CAA က 270° ကနေပြီး 0° ကို clockwise အတိုင်းသွားပေးမှာမဟုတ်ပဲ counter clockwise အတိုင်းသာလှည့်ပေးတာမို့လို့ပါ။
အဲဒါကြောင့် ကိုယ့် target က 3° လောက်မှာရှိပြီးတော့ ကိုယ့်လက်ရှိကင်မရာ angle က 357° မှာရှိနေပေမယ့်လည်း 357° ကနေပြီး 3° ကိုအနီးဆုံးလမ်းကြောင်းဖြစ်တယ့် clockwise အတိုင်းသွားပေးမှာမဟုတ်တယ့်အပြင် counter clockwise အနေနဲ့ကလည်းသူ့ရဲ့ safety range အတွင်းမှာရှိနေတာမို့လို့လှည့်ပေးမှာမဟုတ်တယ့်အတွက် အဲ့ဒီလိုအခြေအနေမျိုးမှာဆိုရင် CAA ရဲ့ control page အထဲကိုဝင်ပြီး ကိုယ့်လိုချင်တယ့် angle ရဲ့ value ကို manually ရိုက်ထည့်ကာလှည့်ခိုင်းရမှာဖြစ်ပါတယ်။ အဲဒီအချက်ကိုအထူးသတိထားရမှာဖြစ်ပါတယ်ခင်ဗျ။
ဒါကြောင့်ကိုယ်ရိုက်တယ့် target ရဲ့ ကင်မရာ angle ကတစ်ချိန်လုံးမှန်မမှန်ဆိုတာကို မရိုက်ခင် preview မှာကတည်းက ကနဦးကင်မရာရဲ့ angle value နဲ့ ကြယ်တွေရဲ့အနေအထား၊ သူတို့ရဲ့အရောင်တွေကိုကြည့်ပြီးမှတ်သားထားနိုင်မယ်ဆိုရင်တော့ အများကြီးအထောက်အကူပေးနိုင်လိမ့်မယ်လို့ ကျွန်တော်တော့ယုံကြည်ပါတယ်ခင်ဗျ။ ဘာဖြစ်လို့လဲဆိုတော့ Sh2-129 + Ou4 target ကိုရိုက်တုန်းကသူတို့ရဲ့အလယ်မှာရှိနေတယ့် ကြယ်နှစ်လုံးကထောင့်ဖြတ်အနေအထားအနေနဲ့ ရှိနေတာဖြစ်ပြီး ဘယ်လိုပဲ 180° လှည့်ပြီးကြည့်ကြည့် အဲဒီကြယ်နှစ်လုံးဟာ ထောင့်ဖြတ်အနေအထားအတိုင်းပဲ ရှိနေဦးမှာဖြစ်ပြီး အကယ်၍သာ သူတို့ပတ်ဝန်းကျင်ကကြယ်တွေနဲ့ ပဲဖြစ်ဖြစ် သူတို့နှစ်လုံးရဲ့ကိုယ်ပိုင်အရောင်တွေနဲ့ပဲဖြစ်ဖြစ် verify သာမလုပ်ဖြစ်ဘူးဆိုရင် ကိုယ့်ရဲ့ angle ကအတူတူပဲလို့စိတ်ကထင်မှတ်နေမှာမို့လို့ပါပဲ။
အဲဒီမှာမေးစရာမေးခွန်းကရှိလာပါပြီ။ ဘာလဲဆိုတော့ nebula တွေရဲ့ structure orientation နဲ့ကြည့်ပြီး verify လုပ်ရင်ကောမရဘူးလားဆိုတာပါပဲ။ မရဘူးမဟုတ်ဘူး ရပါတယ် ဒါပေမယ့်အမြဲတော့မရနိုင်ပါဘူး ဘာဖြစ်လို့လဲဆိုတော့ ကိုယ်သုံးတယ့် narrowband filter အပေါ်မူတည်လို့ပါပဲ။ Nebula တွေရယ့်အဓိက signal ကအများအားဖြင့် Ha မို့လို့ အကယ်၍သာကိုယ်က L-Synergy filter လိုအမျိုးအစားကိုသုံးမယ် ဒါမှမဟုတ် Nebula ကိုယ်တိုင်ကိုက Ha signal အားနည်းတယ့် Nebula ဆိုရင် display preview မှာ Ha signal ကိုထင်ရှားအောင်ပြမှာမဟုတ်တယ့်အတွက် ကိုယ့် nebula ရဲ့ orientation ကမှန်သလားမမှန်ဘူးလားဆိုတာကို မမြင်နိုင်လို့ပါပဲ။
မှတ်ချက်: 0°–5° နဲ့ 355°–360° ဆိုတဲ့ range တွေဟာ CAA အားလုံးအတွက် တိကျတဲ့ universal safety limit လို့တော့ မဆိုလိုပါဘူး။ ဒီတန်ဖိုးတွေကို ကျွန်တော့်ရဲ့ ကိုယ်ပိုင်စမ်းသပ်တွေ့ရှိချက်ကနေရရှိတယ့် အချက်အလက်အဖြစ် ပြောရမယ်ဆိုရင် ပိုမှန်ပါတယ်…..
မိုးသားကင်းစင်ကြည်လင်သောညများ ဖြစ်ပါစေ — အမြင်ကောင်းများနှင့် အောင်မြင်သော observation များရရှိပါစေ.....