Camera Rotation & Plate Solving in Astrophotography
When I was shooting macro and wildlife photography, I never had to think much about vertical or horizontal framing—I could simply rotate the camera as needed and shoot. But in astrophotography, vertical and horizontal compositions are a bit more complicated.
There are two main options: manually rotating the camera or using a CAA (Camera Angle Adjuster). At the back of most astroscopes, there’s a ring marked with 360-degree measurements. At first, I didn’t really understand what it was for. While researching, I saw people mention it being used for focusing, which only confused me more. Since it didn’t seem related to the calibration and practice I was doing at the time, I ignored it for a while. In the beginning, I didn’t even bother rotating my frame—I just shot as it was.
Later, after taking more images, I started wanting to adjust my composition. That’s when I began learning about frame rotation. As I mentioned earlier, I started with manual rotation. Honestly, I didn’t even know about the ZWO CAA at that time. I thought it would be simple—but in reality, even the “simple” method turned out to be quite tricky.
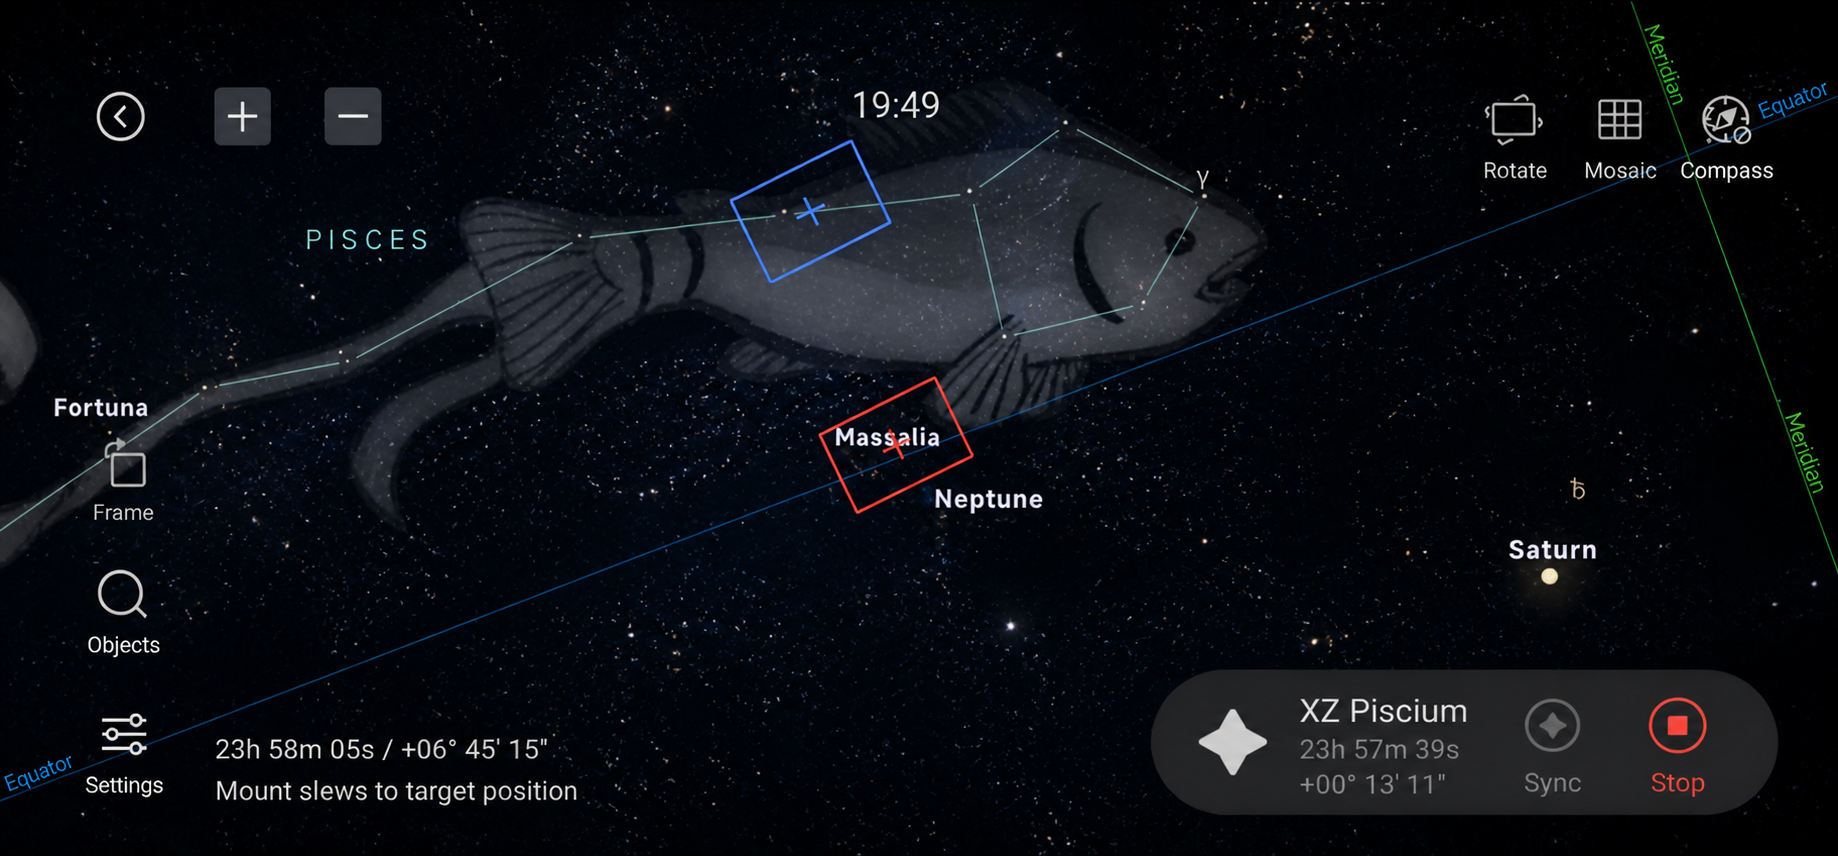
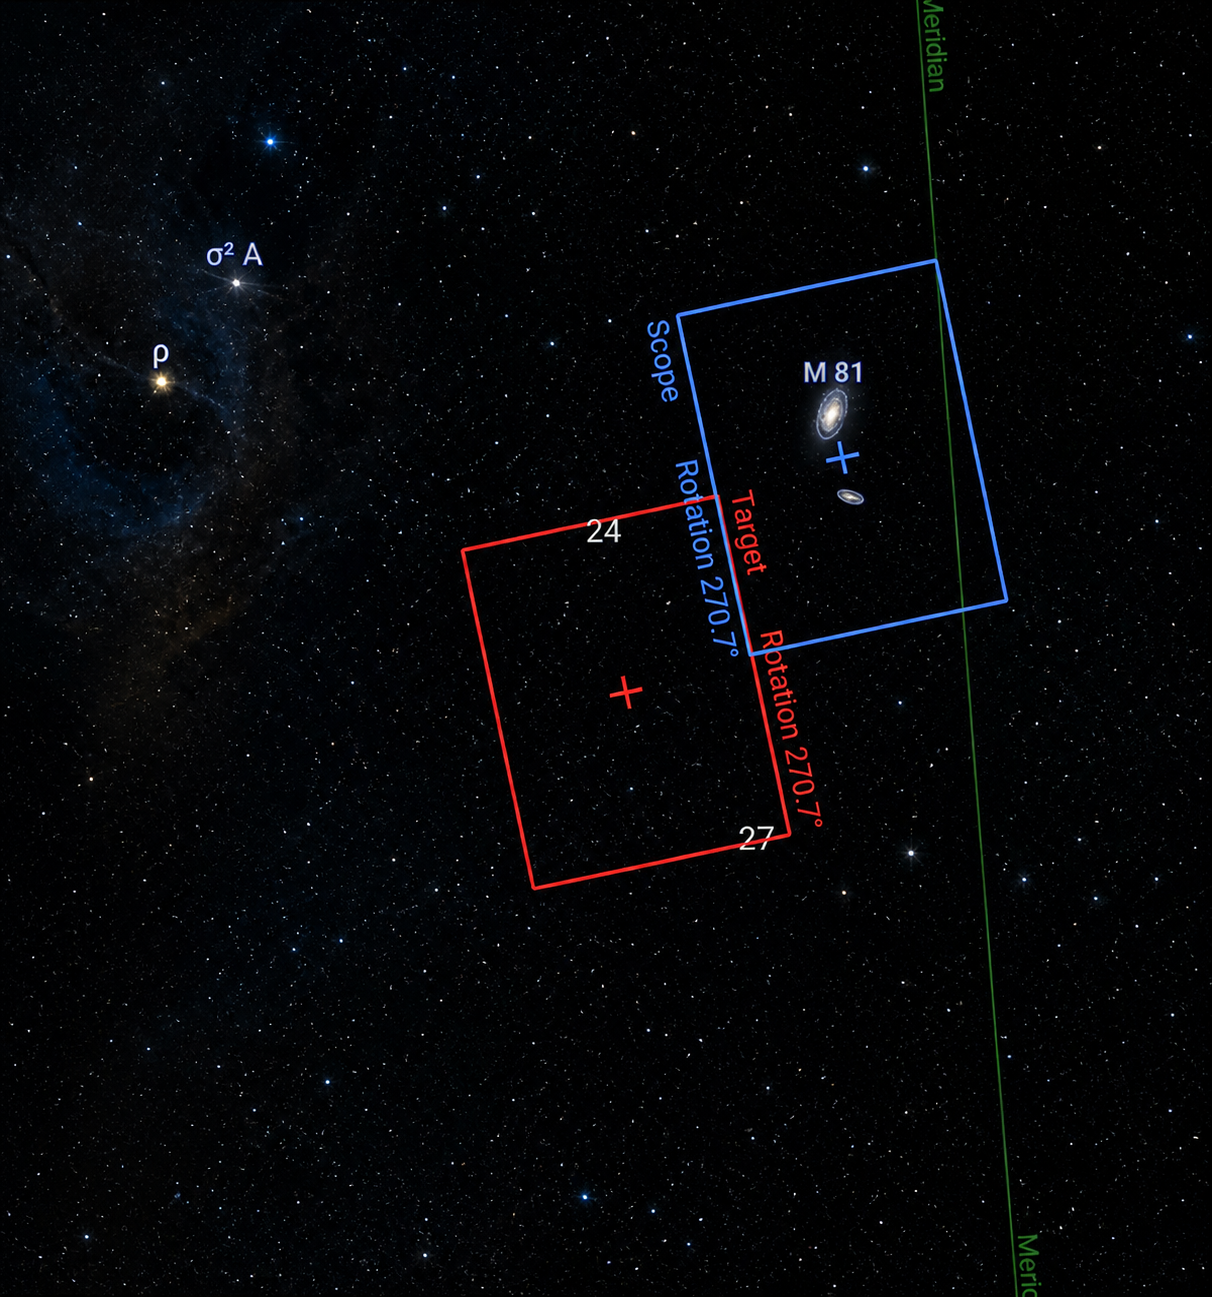
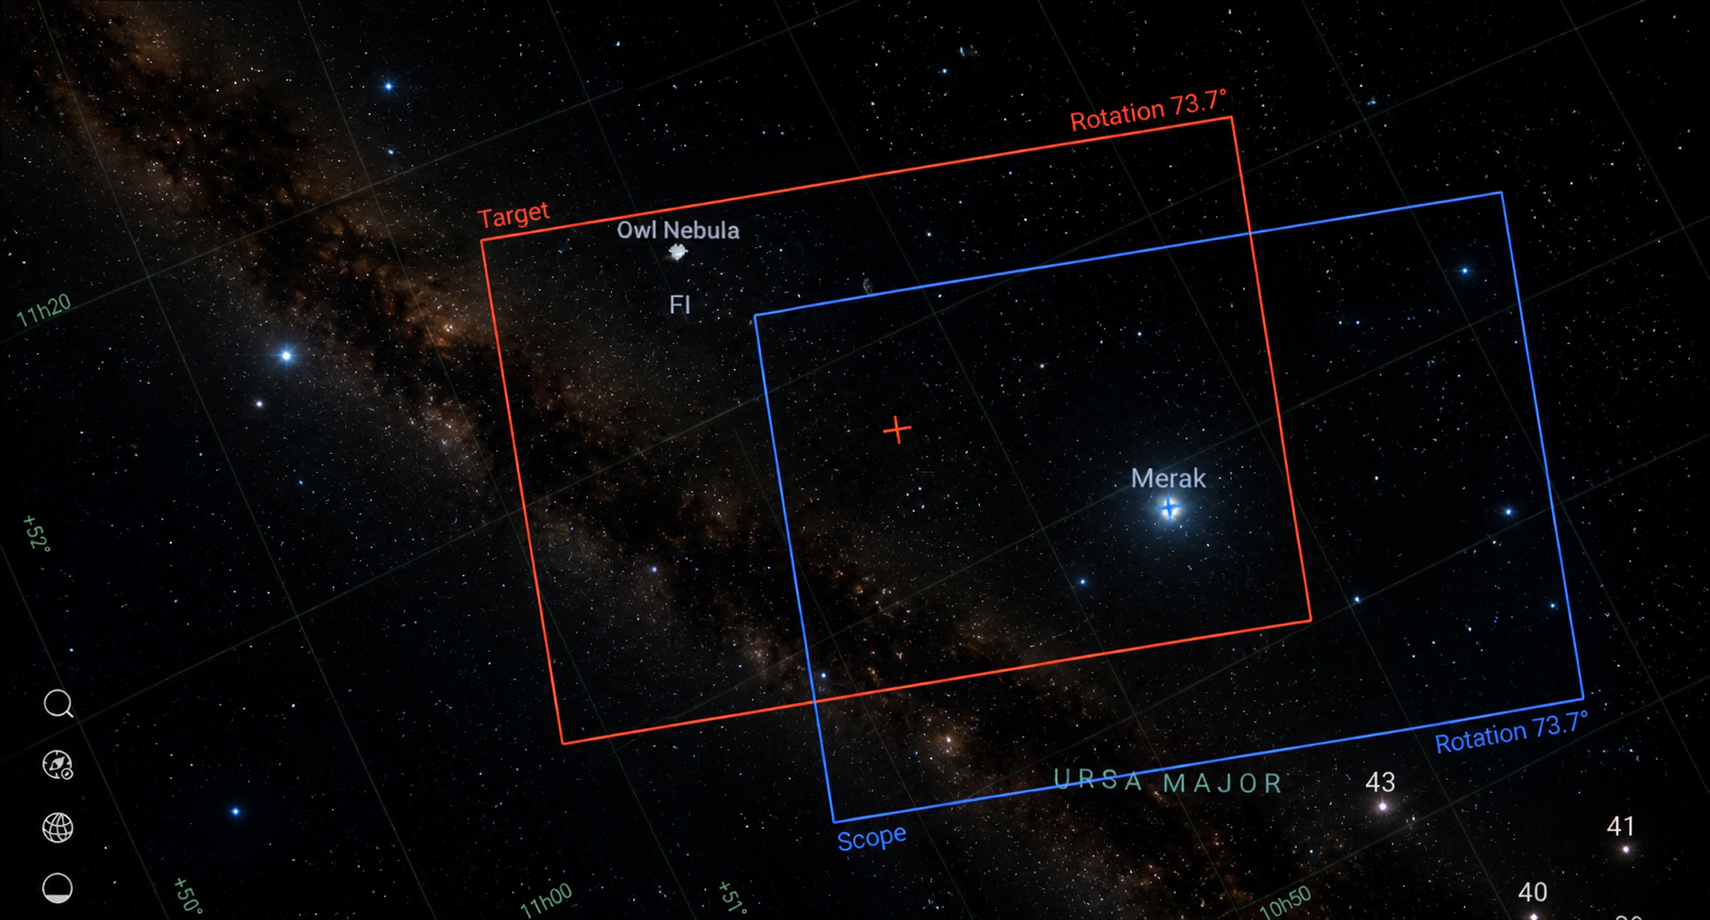
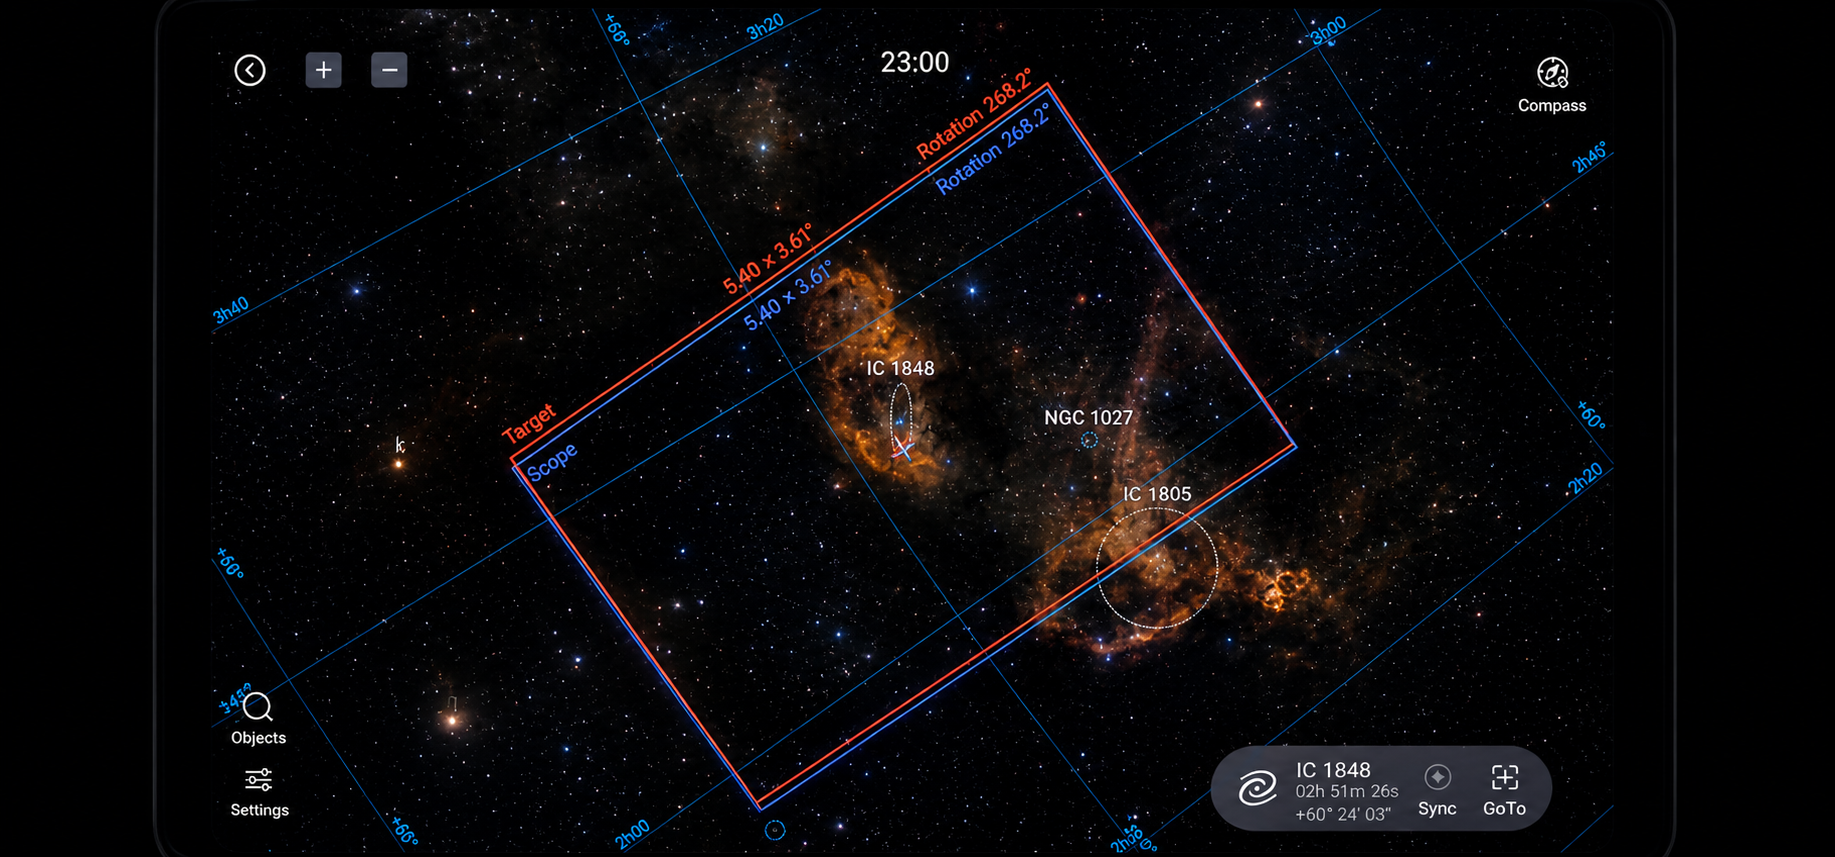
Frame rotation is done while your target is locked. There are two frames involved: the target frame and the scope frame. First, you find your desired object in the atlas and hit search. The target frame (shown in red) will move to your selected object. Then, the scope frame (shown in blue) follows and aligns itself with the target frame.
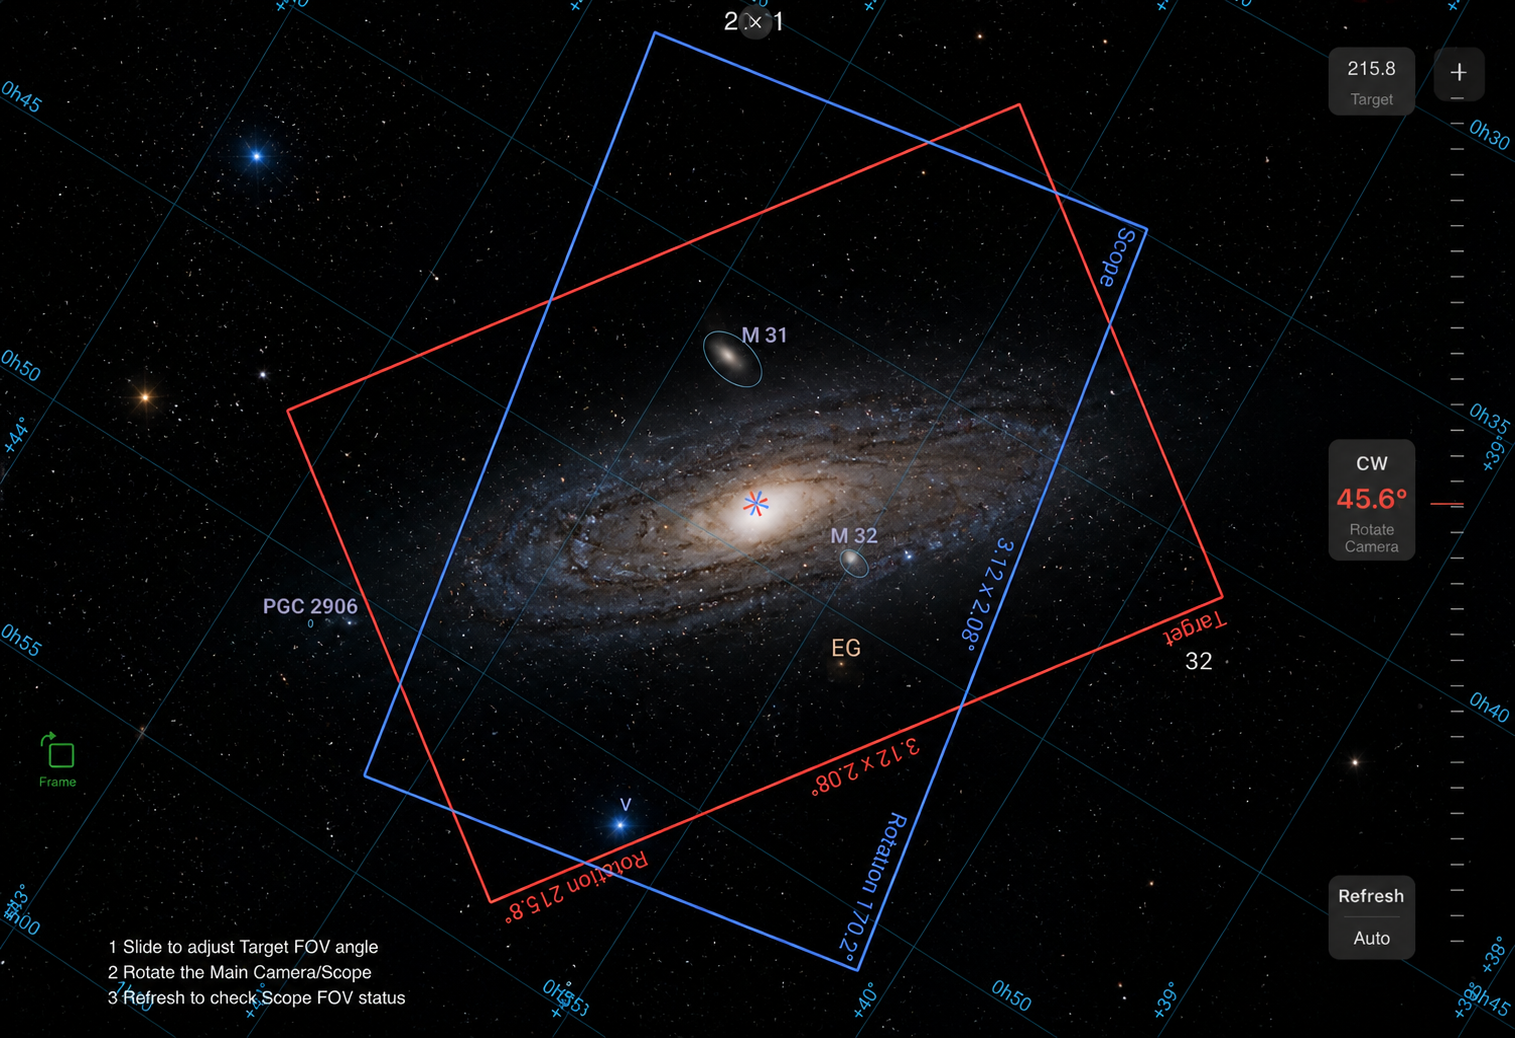
After that, you can adjust the target frame to your desired composition—moving it up, down, left, or right, and even rotating it 360 degrees. As you move the target frame, the scope frame follows to keep both aligned. If both frames already share the same angle, no rotation is needed. But if their angles differ significantly, you’ll need to rotate the scope frame.
Rotating the scope frame manually isn’t complicated—you just physically rotate the camera until it matches your desired angle. Once both frames overlap perfectly, you might think you’re ready to shoot—but that’s actually not correct.
The final and crucial step is plate solving.
You need to go back to the preview screen, take a test shot, and then press the “solve” function. This ensures your final framing is accurately aligned with your intended composition. Without this step, even though the preview shows your adjusted composition, the actual captured images will still follow the old frame orientation from before rotation.
That’s why, whether you rotate manually or use a CAA, plate solving is essential.
You might wonder: if plate solving isn’t automated by the CAA, why use it at all instead of rotating manually?
That’s a fair question. The main advantage of the CAA is that it eliminates the need to physically rotate the camera by hand. Once you adjust the target frame to your desired position, the CAA automatically rotates the camera within 2–3 seconds to match the target angle and align with the scope frame.
Personally, I prefer using the CAA because it provides precise angle positioning and saves a lot of time.
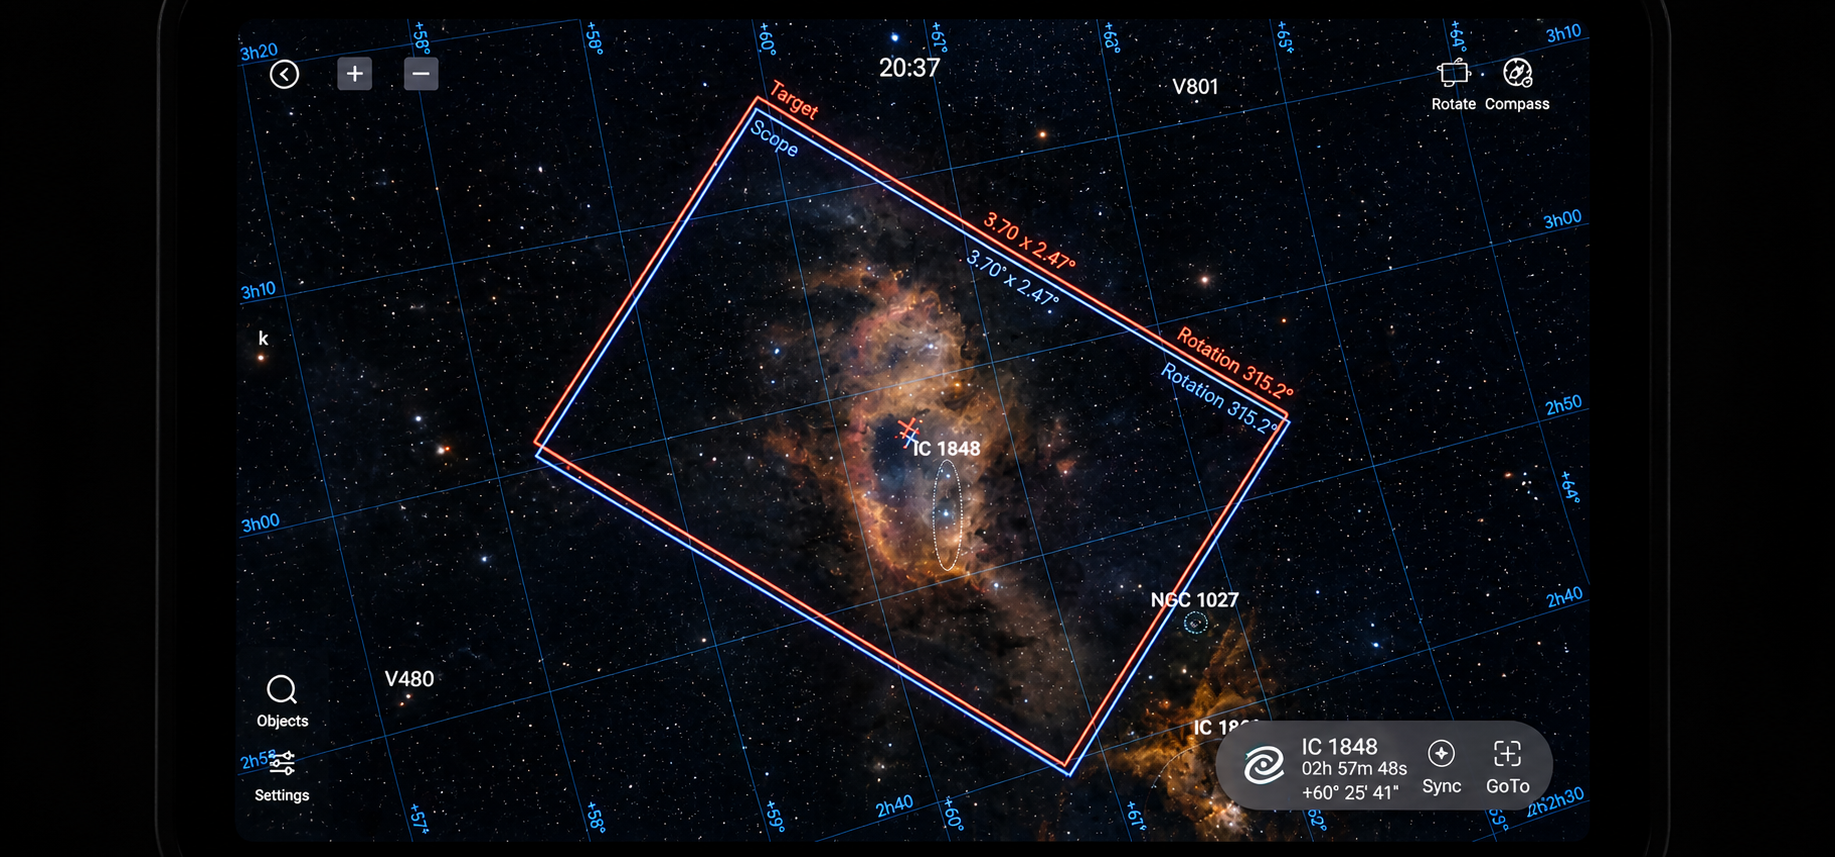
In the example images below, you can see a Heart and Soul Nebula shot where I forgot to perform plate solving after rotating the angle. As a result, the lower portion of the Heart Nebula is missing from the final image.
So in conclusion, plate solving is an essential step in frame rotation—it’s not optional, it’s necessary.
Clear skies and happy observing…..
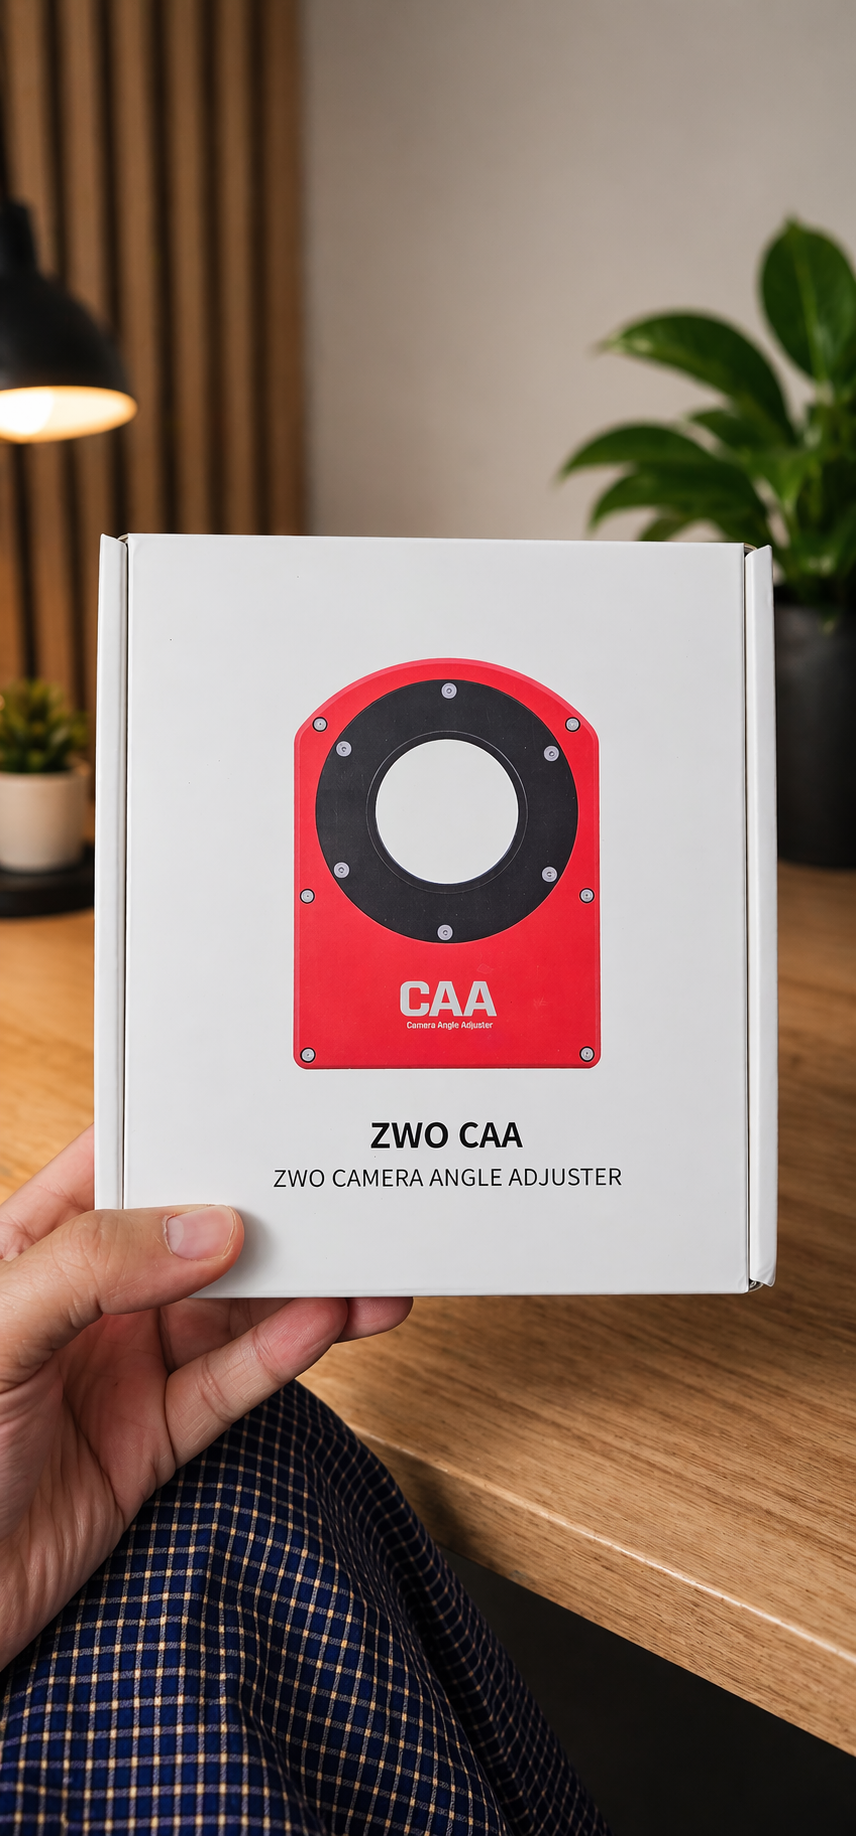
CAA
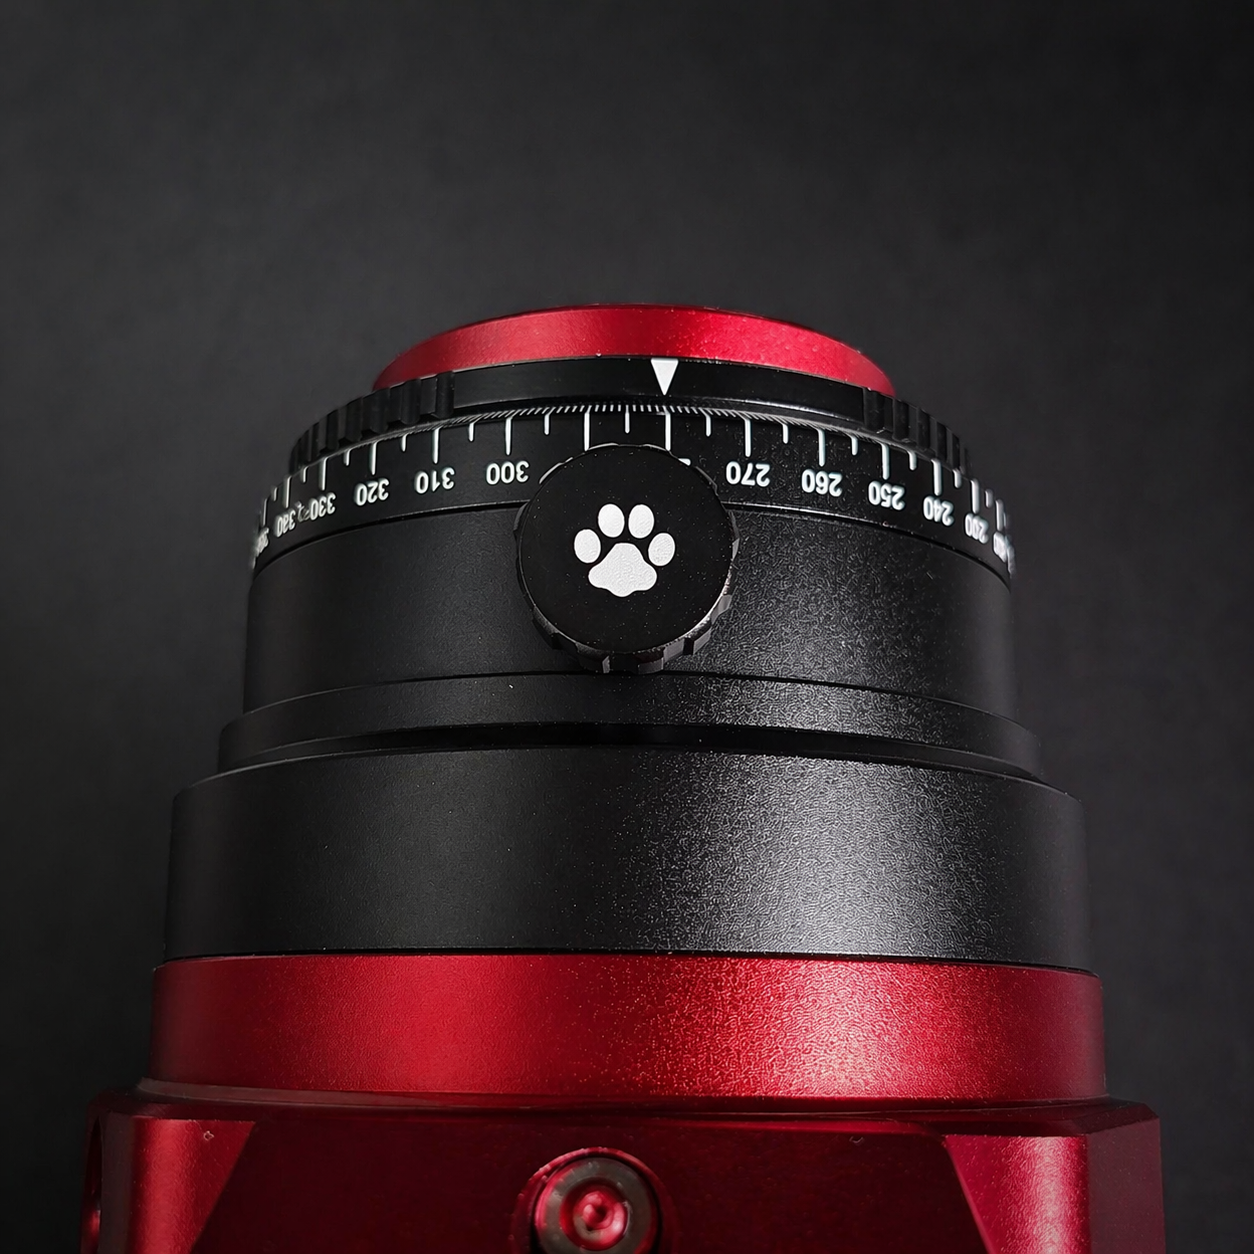
Angle Rotator and Rotator Lock
ကျွန်တော် macro တို့ wildlife တို့ရိုက်တုန်းကဆိုရင် vertical နဲ့ horizontal shoot တွေအတွက်ဘာမှသိပ်ပြီးစဥ်းစားနေစရာမလိုပဲ ကင်မရာကိုလိုအပ်သလိုလှည့်ရိုက်လိုက်ရုံပဲဆိုပေမယ့် astro အတွက်ကတော့ vertical နဲ့ hortizontal shoot တွေကအနည်းငယ်ရှုပ်ထွေးတယ်လို့ပြောရမယ်ခင်ဗျ။
သူ့မှာက option နှစ်ခုရှိတယ် manually rotate လုပ်မှာလား ဒါမှမဟုတ် CAA ဆိုတယ့် angle adjuster သုံးမှာလားဆိုတာပါပဲ။ Astro Scope တွေရဲ့အနောက်ဆုံးမှာ 360 degree ကိုပြတယ့်ဂဏန်းလေးတွေပါတယ့် ring တစ်ခုရှိတယ်။ အစကတော့ကျွန်တော်လည်းဘာအတွက်သုံးတယ်ဆိုတာကို သေချာမသိခဲ့ဘူးဗျ။ လိုက်ပြီးလေ့လာတော့လည်း focusing အတွက်ပဲသုံးသလိုလိုပြောနေတာတွေကိုတွေ့ရလို့ စိတ်ရှုပ်လာပြီးလောလောဆယ်လေ့ကျင့်နေတာတွေ calibartion လုပ်နေတာတွေနဲ့ဆက်စပ်နေလား မဆက်စပ်ဘူးလားဆိုတာလောက်ကိုပဲစစ်ဆေးလိုက်ပြီး မဆက်စပ်နေတာနဲ့ခဏမေ့ထားလိုက်တယ်ဆိုပါတော့။ အစပိုင်းဆိုတော့ frame ကိုလည်း rotation မလုပ်ဖြစ်ပဲသုံးနေတာလဲပါတာပေါ့ခင်ဗျ။
နောက်ပိုင်းပုံတော်တော်များများကိုရိုက်ဖူးလာပြီးတော့မှ ကိုယ်လိုချင်တယ့် composition ကိုပြောင်းရိုက်ချင်လာရောဆိုပါတော့။ အဲဒါနဲ့ပဲ frame rotation အပိုင်းကိုစပြီးလေ့လာရတော့တာပေါ့။ ကျွန်တော်ပြောခဲ့သလိုပဲ option နှစ်ခုအထဲက manually rotation ကိုပဲစပြီးလေ့ကျင့်ဖြစ်ခဲ့ပါတယ်။ အမှန်တိုင်းပြောရရင် ZWO CAA ရှိနေတယ်ဆိုတာကိုလည်း သိကိုမသိခဲ့သေးတာ။ စိတ်ထဲမှာထင်နေတာက ရိုးရှင်းမယ်ပေါ့ ဘယ်ကလာ ရိုးရိုးလေးနဲ့ရှုပ်တယ်ဆိုတာအဲ့ကောင်မှအစစ်။ Frame rotation က ကိုယ်ရိုက်ချင်တယ့် subject ကို target lock လုပ်နေတယ့်အချိန်မှာလုပ်ဆောင်ရတာပါ။ သူ့မှာက Frame နှစ်ခုပါပါတယ် တစ်ခုက target frame ဖြစ်ပြီးတော့ နောက်တစ်ခုက scope frame ပါ။ ပထမကိုယ်လိုချင်တယ့် subject ကို atlas မှာရှာ၊ ပြီးရင် search ကိုနိုပ်လိုက်၊ အဲဒီအခါကြရင် target frame (red color) ကကိုယ်လိုချင်တယ့် target ဆီအရင်သွားပါလိမ့်မယ်။ Target frame က ကိုယ်လိုချင်တယ့် target အပေါ်ရောက်သွားတာနဲ့ချက်ချင်းဆိုသလို scope frame (blue color) ကလည်းအနောက်ကနေလိုက်လာပြီး targe frame နဲ့ထပ်သွားအောင်နေရာချပါလိမ့်မယ်။ ပြီးရင် target frame ကိုကိုယ်လိုချင်တယ့် composition အတိုင်းဖြစ်သွားအောင် အထက်အောက်ဘယ်ညာရွှေ့လိုရသလို 360 degree rotation လည်းလုပ်လို့ရပါတယ်။ Target frame ကိုအထက်ဘယ်ညာနေရာရွှေ့လိုက်တိုင်း scope frame ကလိုက်ပြီး frame နှစ်ခုကိုတထပ်တည်းကျအောင်လိုက်ပြီးနေရာချပါလိမ့်မယ်။ တစ်ခုပဲ frame နှစ်ခုရဲ့ angle degree ကအတူတူပဲဆိုရင်တော့ rotation အတွက်ဘာမှလိုက်လုပ်စရာမလိုပေမယ့် angel degree နှစ်ခုကအရမ်းကွာနေမယ်ဆိုရင်တော့ scope frame ကိုလိုက်ပြီး rotate လုပ်ပေးရမှာပါ။ Scope frame ကို rotate လိုက်လုပ်ပေးရတာကလည်း မရှုပ်ထွေးပါဘူး ကိုယ်လိုချင်တယ့် angle ကိုရောက်အောင် camera ကို manually လိုက်လှည့်ပေးလိုက်ရုံပါပဲ။ Frame နှစ်ခုစလုံးကိုထပ်ထူကျအောင်လုပ်ပြီးတာနဲ့ rotation process ပြီးသွားပြီ ရိုက်ဖို့အဆင့်ဖြစ်နေပြီလို့တွေးလိုက်ရင်တော့ မှားသွားမှာပါ။ ဘာဖြစ်လို့လဲဆိုတော့ နောက်ဆုံးအဆင့်ဖြစ်တယ့် plate solving step အတွက် preview screen ကိုပြန်သွားပြီး အစမ်းပုံတစ်ပုံရိုက်၊ ပြီးရင် solve ဆိုတယ့် function ကိုနှိပ်ကာ ကိုယ့်ရိုက်ချင်တယ့် target ကိုထပ်ပြီး final အတွက် plate solving လုပ်ပေးမှ ready to shoot ဖြစ်မှာမို့လို့ပါပဲခင်ဗျ။ မဟုတ်ရင်တော့ ကိုယ်ရိုက်ထားတယ့်ပုံတွေအားလုံးက preview မှာတော့ကိုယ်လှည့်လိုက်တယ့် composition အတိုင်းပြနေပေမယ့် actual image ကတော့ အရင် angle မပြောင်းခင်က frame composition အတိုင်းပဲထွက်လာပါလိမ့်မယ်။ ဒါကြောင့် camera ကို manually ပဲ rotation လုပ်လုပ် CAA နဲ့ပဲ rotation လုပ်လုပ် plate solving ကိုမဖြစ်မနေလုပ်ပေးရမယ်လို့ပြောချင်ပါတယ်ခင်ဗျ။ ဒါဆိုဘာလို့ CAA ကိုသုံးနေတော့မှာလဲ ကိုယ့်ဘာသာကို manually ပဲလှည့်မှာပေါ့ CAA သုံးတာက plate solving ကို automatic လုပ်ပေးတာမှမဟုတ်ပဲဆိုပြီးတော့တွေးကောင်းတွေးမိကြမှာပေါ့။ ဟုတ်ပါတယ် CAA ရဲ့အဓိကလုပ်ဆောင်ချက်က target frame ကိုရွှေ့လိုက်တိုင်း camera ကို manually လိုလူကလက်နဲ့လိုက်ပြီးလှည့်ပေးစရာမလိုတော့ပဲ target frame ကိုကိုယ်လိုချင်တယ့်နေရာကိုရွှေ့ပြီးတာနဲ့ 2-3 စက္ကန့်အတွင်းမှာပဲ frame target ရဲ့ angle အတိုင်း camera ကို automatic လှည့်ကာ scope frame ရဲ့ angle ကိုချက်ချင်းလိုက်တည့်ပေးဖို့ပါ။ ကျွန်တော်ကတော့သုံးရတာကြိုက်တယ် ဘာဖြစ်လို့လဲဆိုတော့ angle position အတိအကျကိုလည်းရသလို အချိန်လည်းသိပ်မပေးရလို့ပါပဲခင်ဗျ။
အထက်ကပုံတွေထဲက heart and soul nebula ပုံတစ်ပုံမှာ angle rotation လုပ်ပြီးနောက် plate solving မလုပ်မိလို့ heart nebula ရဲ့အောက်ပိုင်းတစ်ခြမ်းလုံးပုံထဲမပါလာတာကိုတွေ့ရမှာပါခင်ဗျ။ ဒါကြောင့် plate solving ဟာ frame rotation အတွက်မရှိမဖြစ်လိုအပ်တယ့် လုပ်ဆောင်ချက်တစ်ခုပါပဲခင်ဗျ.....
မိုးသားကင်းစင်ကြည်လင်သောညများ ဖြစ်ပါစေ — အမြင်ကောင်းများနှင့် အောင်မြင်သော observation များရရှိပါစေ.....