Astrophotography Calibration Frames Explained (Flats, Darks, Flat Darks, Bias)
In astrophotography, calibration frames—flats, darks, flat darks, and bias—are used to clean up image quality by removing noise and correcting sensor defects.
Flats are frames taken with evenly distributed light. They are used to correct uneven illumination and remove dust shadows inside the lens or telescope. In short, they fix issues like dust spots and vignetting.
Darks are taken with the lens or telescope completely covered (no light entering). They are used to remove sensor noise, such as heat-generated noise and hot pixels that appear in light frames.
Flat darks are captured with the same exposure as flats but with no light entering the system. Their main purpose is to remove noise from the flat frames themselves.
Bias frames are taken with the fastest possible shutter speed. They are used to remove the camera’s base read noise.
Since I use a modern CMOS camera, I mainly rely on flats and flat darks. Because I use flat darks, I skip both darks and bias frames.
For taking flats, some people place a white T-shirt over the lens or telescope, while others use a diffuser along with a laptop or tablet displaying a white screen. Personally, I use a DIY diffuser frame combined with a tablet’s white screen.
Recommended Settings
Flats
Exposure: 0.5 – 0.8 seconds
Gain: 100
Temperature: -10°C (or your usual setting)
Frames: 20 – 30
Flat Darks
Exposure: 0.5 – 0.8 seconds
Gain: 100
Temperature: -10°C (or your usual setting)
Frames: 20 – 30
Darks
Exposure: 0.5 – 0.8 seconds
Gain: 100
Temperature: -10°C (or your usual setting)
Frames: 20 – 30
Bias
Exposure: 0.0001 – 0.001 seconds (fastest possible)
Gain: 100
Temperature: -10°C (or your usual setting)
Frames: 50 – 100
When I first started learning astrophotography and processing my images in PixInsight, I didn’t realize how much better the results could be when using calibration frames. To be honest, I didn’t even know what calibration frames were. I thought simple editing—like in regular photography—was enough.
It wasn’t until I started using a 600mm scope and encountered dust spot issues that I began searching for solutions and learned about calibration frames.
In astrophotography, we push our cameras to their limits. As a result, issues like sensor noise (hot pixels), thermal noise (amp glow), dust shadows, and vignetting become unavoidable. That’s why calibration frames are essential—they allow us to remove these problems and significantly improve image quality.
If you compare images processed with and without calibration frames, you’ll clearly see the difference. Without them, dust spots and uneven illumination are visible. With them, those artifacts are removed, and vignetting disappears. Another key benefit is noise reduction—images processed with calibration frames require less aggressive noise reduction, which helps preserve sharpness and detail much better.
Clear skies and happy observing…..
Astrophotography မှာ calibration frames တွေဖြစ်တယ့် (flat, dark, flat dark, bias) တွေက image quality ကို သန့်ရှင်းစေပြီး noise နဲ့ sensor defects တွေကို ဖယ်ရှားဖို့ သုံးတာပါ။ Flats ဆိုတာကအလင်းညီညီရှိတယ့် frame ကိုယူပြီး lens/telescope ထဲကဖုန်အရိပ်တွေ၊ အလင်းမညီမှုတွေကိုပြင်ဖို့သုံးတာပါ။ ဆိုလိုတာက dust နဲ့ vignetting တွေကိုပြင်ဖို့ပေါ့ခင်ဗျ။ Darks ဆိုတာက lens/telescope ကိုအလင်းမဝင်ပိတ်ထားပြီးရိုက်တယ့် frame ဖြစ်ပြီး sensor noise ကိုဖယ်ရှားဖို့သုံးတာပါ။ ဆိုလိုတာက light frames အထဲက sensor heat noise နဲ့ hot pixel တွေကိုဖယ်ရှားဖို့အတွက်ဖြစ်ပါတယ်။ Flat dark ဆိုတာက flats ကိုရိုက်တယ့် exposure အတိုင်း lens/telescope ကိုအလင်းမဝင်အောင်ပိတ်ထားပြီးရိုက်တယ့် frame ပါ၊ အဓိကက flats အထဲက noise တွေကိုဖယ်ရှားပစ်ဖို့အတွက်ပေါ့ခင်ဗျ။ Bias ဆိုတာကတော့ faster shutter နဲ့ရိုက်တယ့် frame ဖြစ်ပြီး camera တွေရဲ့ base noise ကိုဖယ်ရှားဖို့သုံးတာဖြစ်ပါတယ်။
ကျွန်တော်ကတော့ modern CMOS camera ကိုသုံးတာမို့လို့ flats နဲ့ flat dark တို့ကိုပဲအဓိကသုံးဖြစ်ပါတယ်။ Flat dark သုံးမှာမို့လို့ darks နဲ့ bias တို့ကိုမသုံးပဲ skip မှာပါ။ Flats အတွက်ရိုက်တယ့်နေရာမှာ တစ်ချို့က lens/telescope ထိပ်မှာ စွပ်ကျယ်အင်္ကျီအဖြူကိုစွပ်ပြီးသုံးကြသလို တစ်ချို့ကလည်း diffuser ခံပြီး laptop သို့မဟုတ် tablet တွေရဲ့ white screen နဲ့သုံးကြပါတယ်။ ကျွန်တော်ကတော့ DIY လုပ်ထားတယ့် diffuser frame နဲ့ diffuser ကို tablet white screen နဲ့တွဲသုံးပါတယ်ခင်ဗျ။
Setting တွေကိုရှင်းပြရရင်တော့
Flats အတွက်ဆို
Exposure: 0.5 - 0.8 second
Gain: 100
Temperature: -10°C or your setting
Frames: 20 - 30 frames
Flat Dark အတွက်ဆို
Exposure: 0.5 - 0.8 second
Gain: 100
Temperature: -10°C or your setting
Frames: 20 - 30 frames
Darks အတွက်ဆို
Exposure: 0.5 - 0.8 second
Gain: 100
Temperature: -10°C or your setting
Frames: 20 - 30 frames
Bias အတွက်ဆို
Exposure: 0.0001 - 0.001 second (fastest possible)
Gain: 100
Temperature: -10°C or your setting
Frames: 50 - 100 frames
ကျွန်တော် astrophotography ကိုစပြီးလေ့လာကာစ ကိုယ်ရိုက်ထားတယ့်ပုံတွေကို PixInsight နဲ့ retouching လုပ်တာစပြီးအဆင်ပြေတုန်းကဆိုရင် calibration frame တွေပါတွဲသုံးရင်ပုံထွက်ကဒီထက်အများကြီးပိုကောင်းတယ်ဆိုတာကိုမသိခဲ့ဘူး။ အမှန်အတိုင်းဝန်ခံရရင် calibration frame ဆိုတာသိကိုမသိသေးတာ။ သာမန် photography တွေလိုပဲ editing ကရိုးရိုးရှင်းရှင်းနဲ့ပဲလုပ်လို့အဆင်ပြေတယ်လို့တွေးခဲ့မိတာ။ အမှန်တော့ကျွန်တော်ကိုယ်တိုင်ကလည်း 600mm scope သုံးတော့မှပဲဖြစ်လာတယ့် dust spot ပြဿနာကိုဖြေရှင်းဖို့နည်းလမ်းလိုက်ရှာတာကနေမှစပြီး သိခဲ့ရတာပါ။ ကျွန်တော်တို့က astrophotography မှာ camera ကိုသူ့ performance ရဲ့အဆုံးစွန်အထိအသုံးပြုကြတာမို့လို့ sensor noise (hot pixel), thermal noise (amp glow), dust shadows နဲ့ vignetting စတာတွေကို amount များများနဲ့ကိုယ့်ရဲ့ပုံထွက်တွေမှာရှောင်လွဲလို့မရအောင်လက္ခံရရှိတာကြောင့် အဲ့ဒါတွေကိုမဖြစ်မနေရှင်းထုတ်ပစ်ဖို့အတွက် calibration frame တွေကို essential အနေနဲ့သုံးကိုသုံးကြရတာပါခင်ဗျ။
အောက်ကပုံတွေမှာ calibration frames တွေကိုသုံးခြင်းနဲ့မသုံးခြင်းရဲ့ ကွာခြားမှုတွေကိုတွေ့ရမှာပါ။ မသုံးတယ့်ပုံမှာ dust ကနေဖြစ်တယ့်အကွက်တွေကိုတွေ့ရမှာဖြစ်ပြီး သုံးထားတယ့်ပုံမှာတော့အဲ့အကွက်တွေအားလုံးရှင်းလင်းသွားတာကိုတွေ့ရမှာပါ။ Vignetting မရှိတော့တာကိုလည်းတွေ့ရမှာဖြစ်ပါတယ်။ နောက်တစ်ချက်ဘာကိုထပ်ပြီးသတိထားမိသလဲဆိုတော့ noise cancellation အပိုင်းမှာဆိုရင်လဲ calibration frame သုံးထားတယ့်ပုံက မသုံးထားတယ့်ပုံထက် noise cancellation percentage သုံးရတာအများကြီးပိုနည်းတာဖြစ်တယ့်အတွက် ပုံရဲ့ sharpness အပိုင်းမှာအများကြီးပိုကောင်းတာကိုတွေ့ရတာပါပဲခင်ဗျ.....
မိုးသားကင်းစင်ကြည်လင်သောညများ ဖြစ်ပါစေ — အမြင်ကောင်းများနှင့် အောင်မြင်သော observation များရရှိပါစေ.....

Flats Frame Diffuser (DIY)
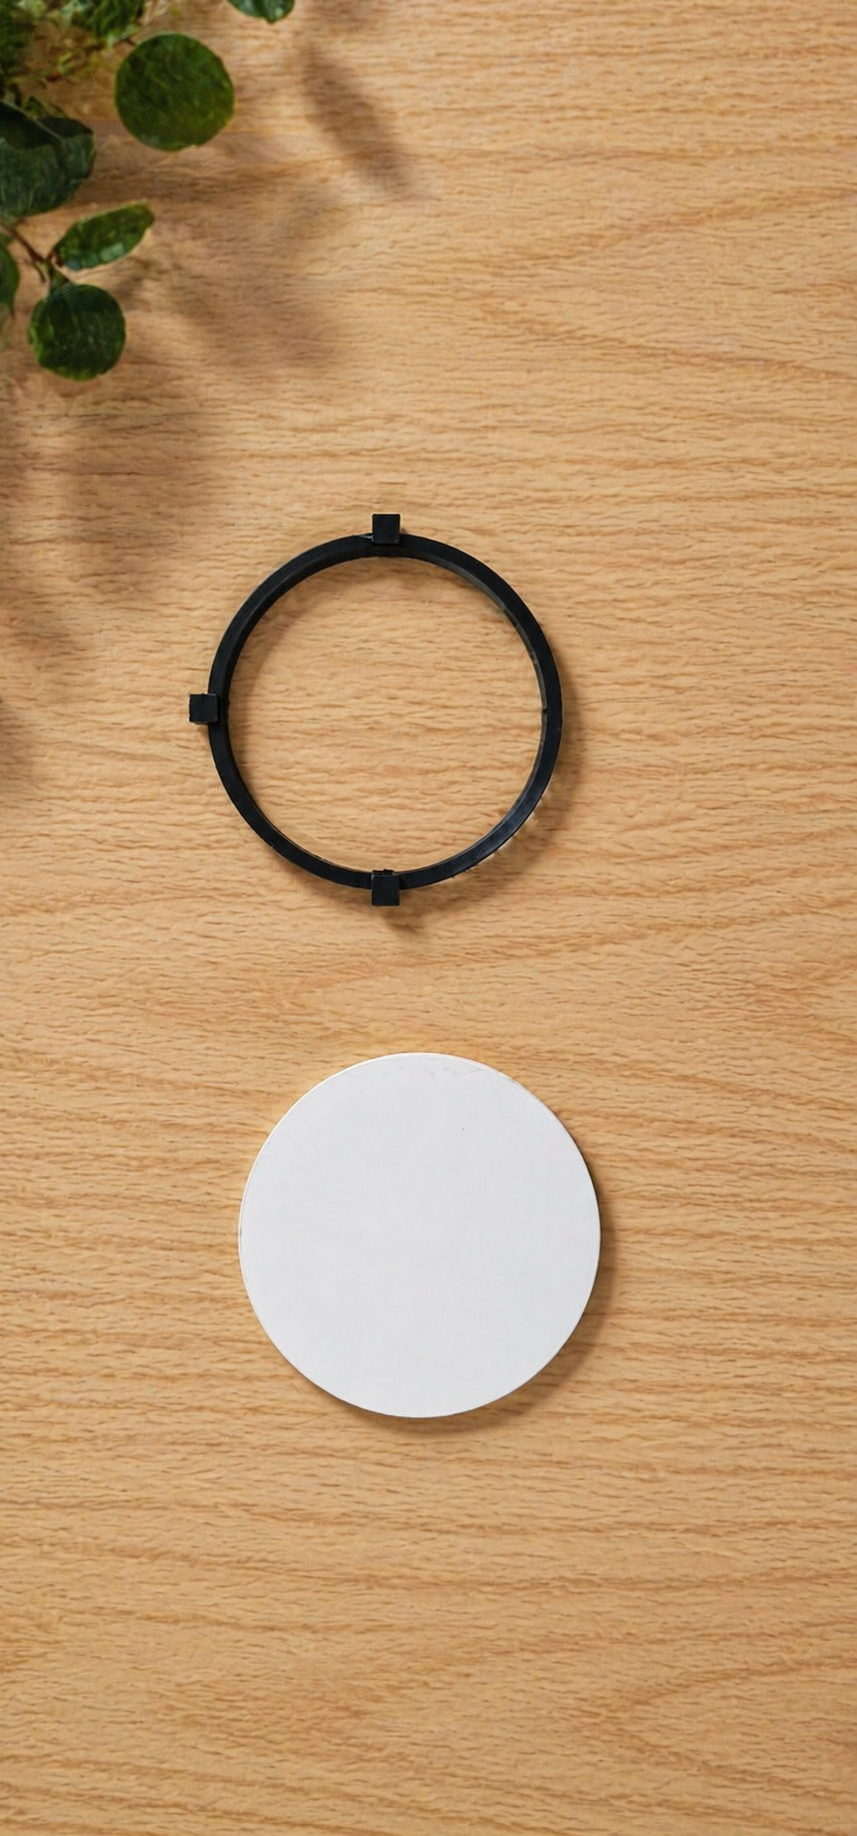
Flats Frame Diffuser (DIY)
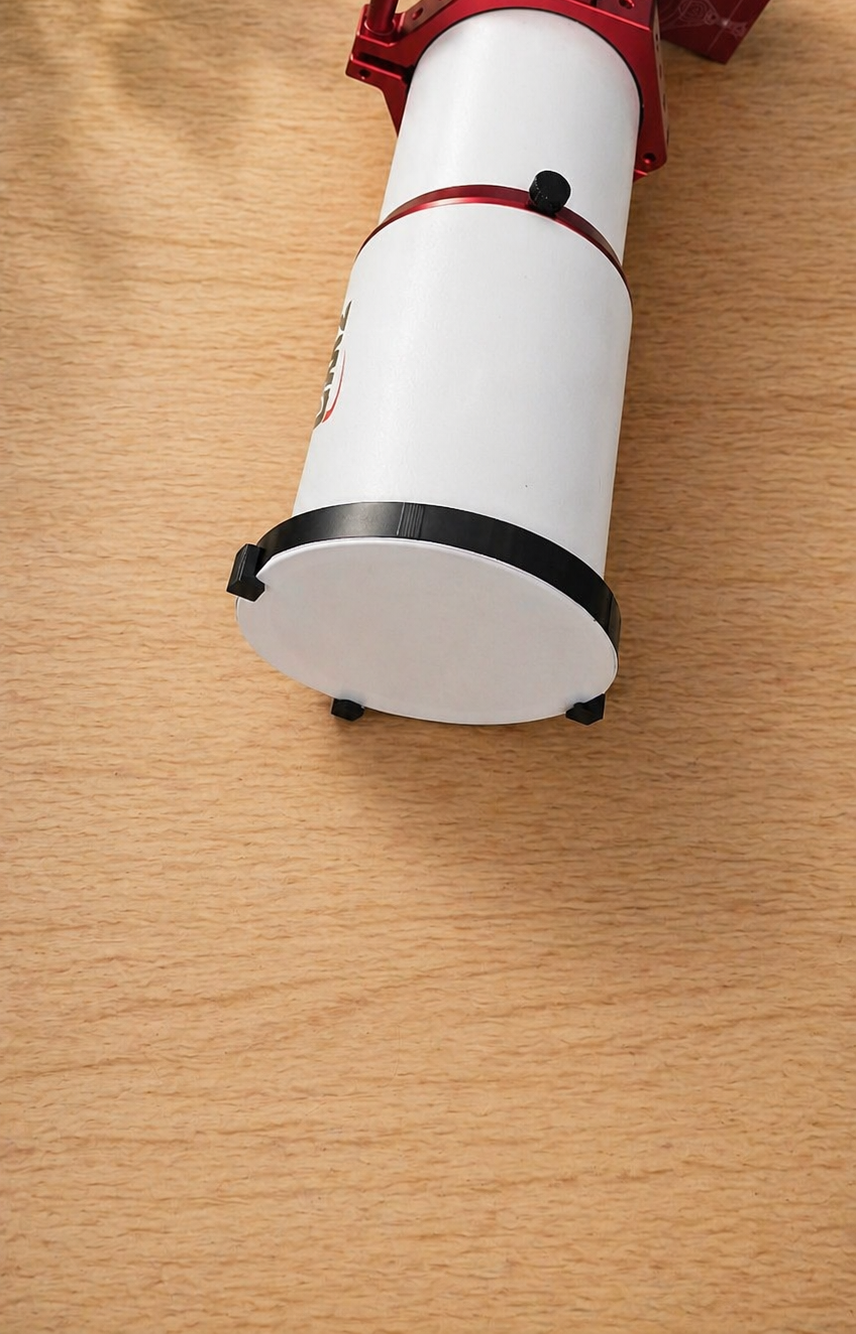
Flats Frame Diffuser (DIY)
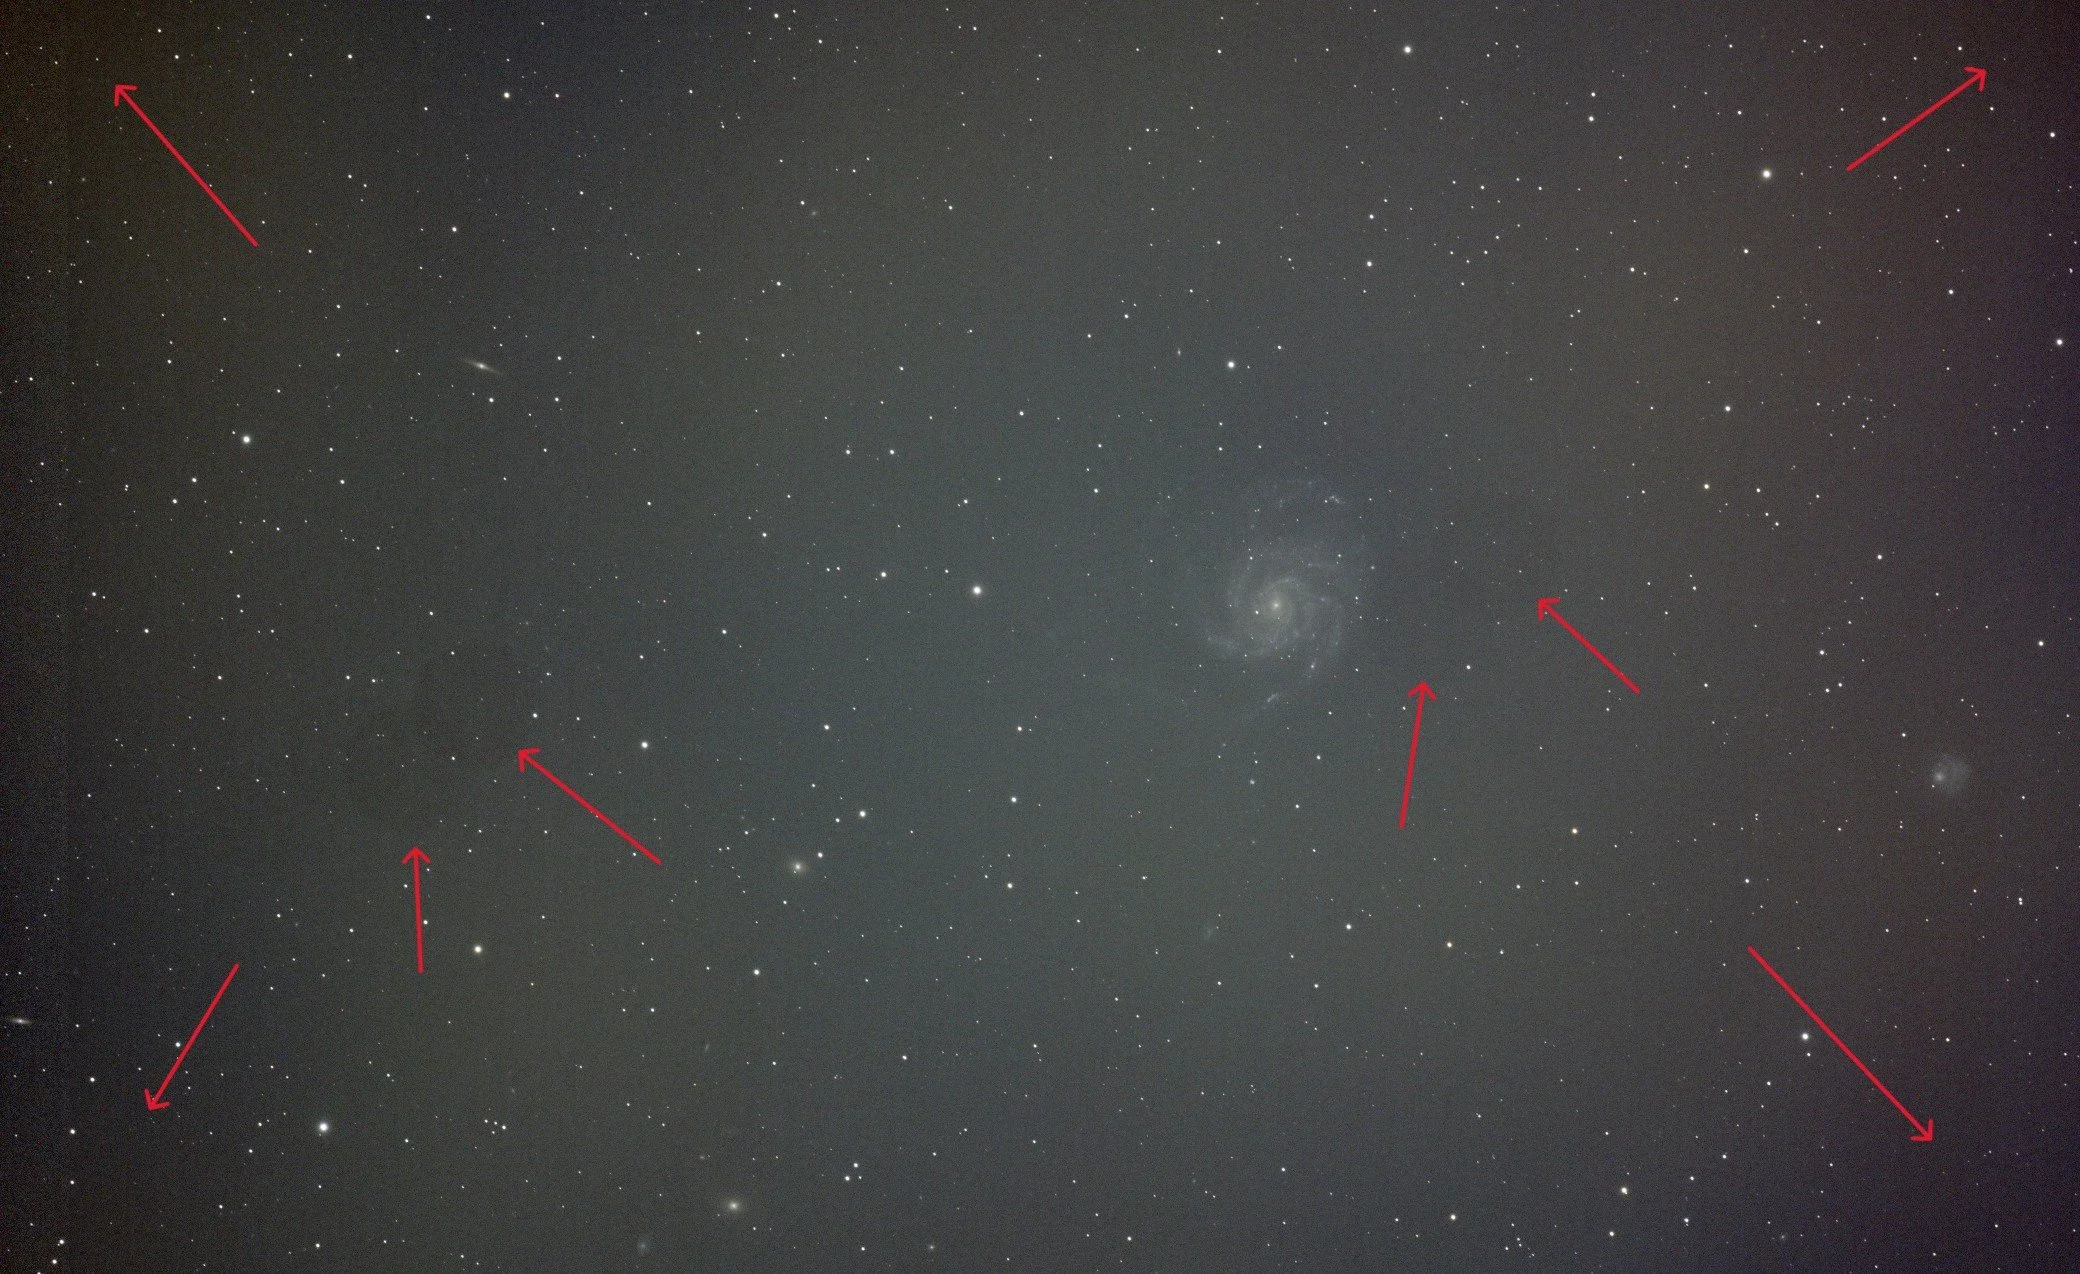
Before

After